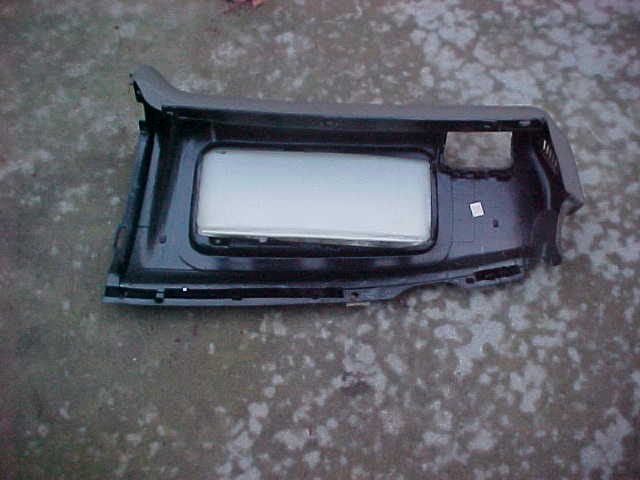
Chrysler Minivan transmission Removal & Replacement
1994-2012
Please join me in mourning the death of Lee Iacocca as of 7/2/2019. Lee was in
charge of Chrysler during the development phase of the 1991-1995 minivans and
retired in 1992. Without his vision at Chrysler the minivan of this era would
have never existed.
The following pictorial documents my minivan project. This is not a
step-by-step guide for removal and replacement of your minivan transmission,
the factory service manual exists for that. However, if your contemplating
this job you may find the following pictorial interesting. This minivan is one
that I bought on July 27th 2005, with a blown transmission, specifically as a
project vehicle. At time of purchase it had 148.6K miles on it. I sold this van December
18th 2012, at the time of sale it had 194K miles on it.
It takes a lot of work for a non-professional DIYer to get through a project
of this magnitude. I am also indebted to the users of the rec.autos.makers.chrysler
Usenet newsgroup, some of whom provided excellent advice!
I had several motivations for completing this project. The first was keeping in mind
that all the energy and time and money invested would be paid back in the years of
future service (barring a massive accident to the vehicle). And that once the energy
and time was invested, I would have a vehicle that I knew every part of intimately and
would know as well as a used car that had been in the family for years. Another
motivation is an economic one - why spend money on a new car when I can keep the
money in the local economy by spending it on a used one and parts to fix it. But most
importantly, I have spent my life fixing things, I've been doing it since I was
young, and I know that repairing any machine, from a car, to a computer, to a human
body, works the same way. You commence the repair not really knowing what's wrong,
but with only a set of guesses to guide you. Three quarters of the time you will
guess right and the repair will be quick and easy - but a quarter of the time the problem
will turn out to be much more subtle than you imagined. That's what "separates
the men from the boys" and when you find out if your really serious about fixing
up a vehicle or just playing around.
Why did I pick this particular minivan? The first reason is that my family already
owns a 1995 Town & Country minivan. The engines between both vehicles are
identical, the bodies are identical, the controls identical. If one van were
ever to be involved in a massive collision it would be donor parts for the other.
The second reason is simply that I like the additional amenities of a T&C, the
leather seats, the longer body and larger engine. If your going to fix up a
vehicle you might as well fix up a fun one like a more luxury model than a
bare bones economy model. This van had 148,000 miles on it when I bought it.
The initial purchase price for this van plus the expense of towing it home and the
fuel to tow it home was $414.85. I learned a lesson there! UHaul rents a car
trailer for $50 for the weekend, and there's no mileage on a trailer. The catch
is that unless the vehicle your towing the trailer with is heavier than what your
towing, they won't rent the trailer to you. I ended up renting a UHaul truck to
tow the trailer, which with mileage and fuel was half the cost of the $400. Next
time I'll buy a vehicle closer to home and get a AAA tow. Note that if you think
this is a good idea, if your doing extended towing with AAA you must wait until your
extended towing AAA card comes before you can get the free towing, so plan ahead.
Followup note from 1 year after purchase:
This van is my daily driver now, and is still running as of 11/10/2006. It now has
157K miles on it. I just had to replace the transmission input speed sensor, about $20.
I also just had to replace the right rear Antilock Brake wheel sensor, that was $125.00
Total spent on this vehicle so far is $2,359.00
Followup note from Dec 2012:
Van was still running fine with 193,000 miles on it until it started dropping into
limp mode. Troublecodes are errors 53, 36 and 54, (this is the transmission code not the engine
computer code)
I replaced both Input Speed Sensor and Output Speed Sensor with no change. Sensors were from
NAPA, part #TSS100 and TSS200 If anything, the number of error codes increased. Plus, I found
fine metal particles on the output speed sensor. This plus the code 36 leads me to
the conclusion that the transmission is slipping - it could be a low pressure pump or
selonoid pack or something like that - but it is internal to the transmission and not a sensor.
All of this spells the end of this van's service life for the following reasons:
1) Our kids are 7 years older, we don't need minivans to drive around a bunch of
small children accoutriments anymore
2) The engine is 193K miles and I don't expect it to last past 220K. for one thing the
hydraulic lifters in it are getting very noisy
3) The body crash damage - although I managed to get around it in 2005, the fact that it's
there probably put additional stress on the transmission
4) Cost of gasoline has risen significantly and these things are gas hogs.
5) Parts are much harder to find now - the dealer has obsoleted so many of them
Here is a quick guide to replacing the 2 speed sensors:
1) Open hood, use an 8mm socket on an extension to remove selonoid plug from selonoid body
2) Using 2 screwdrivers and a lot of care, pry up lock on speed sensor connector and remove connector
3) Use a 25mm deep socket (1" will work in a pinch) unscrew sensor. Check end for metal filings
4) install new sensor, reinstall connectors to sensor and selonoid
5) Raise front of car and put on jackstands. If this is a FWD van doing this will allow you to run tests with the scantool if you want
6) Remove left front wheel
7) Remove front spash shield in wheel well (10mm bolts)
8) Use a screwdriver and carefully pry up on speed sensor lock and pull connector off sensor
9) Use a 25mm wrench and unscrew sensor. Check end of sensor for metal powder - if you see
any then you can try wiping off sensor and reinstalling then road test van
10) replace sensor, make sure connector is clean of oil and reinsert, reassemble splash shield
11) Reinstall wheel, tighten nuts
12) Run transmission tests with scantool
13) Lower car and torque front wheel nuts to 100ft/pounds
One other issue on this:
Some of the guides out there talk about the wiring harness, specifically the connectors that
plug into the speed sensors, going bad. Chrysler originally made a kit to replace these
it's part# is 4419478, it is no longer available. Some of the trans repair places sell
these kits online and you can find them on Ebay as well. The dealer does still have
these connectors individually available the part numbers are 5014469AA and 5014471AA and
cost about $50 each - but the
parts guy from the dealership I talked to said that the 2000 and later transmissions use
the same connectors and they are available under yet a different part number (which he did
not give me) and are about $45 each. The wires to these connectors tend to break very
close to the connector and sometimes the breaks are under the insulation and cannot
be seen. A scantool won't be able to tell but an oscilloscope can.
Followup note from 12/23/2012
This is my last note on this van, as this is the day I sold it and watched it driven off for the very last time. It went to an auto recycling place in North Portland where it will be taken to pieces and the valuable parts sold, the body will then go over to Schnitzer Steel and be shredded, and then from there will either be melted down in Schnitzer's McMinnville mill and turned into rebar, or sold overseas to Chinese steel mills. From whence they came they shall return.
I listed this van for sale for $300. I got 25 inquiries within 2 days, 3 of them offering $50 more than I listed it at. I specifically sold the van without wheels and tires - the buyer showed up, drove the van off to his "vehicle dismantling business" then came back later with the 4 wheels and tires off the van. Scrapping auto parts today is highly competitive and the moment you list a vehicle for sale for scrap parts you will get lots of people after it.
For anyone who has never sold a car to a wrecker, watch the Mercedes C Class "Soul" Car Commercial
http://www.youtube.com/watch?v=rx04YC13R9U
In many ways this is the end of a chapter in my life - while I own a second minivan, a 1995 Town and Country, my wife and I will never buy another - and very soon that minivan will be parked, as a seldom-used 3rd vehicle. Minivans are vehicles for young families. They are great for young family needs. I bought this van when my kids were both under 10 years old and were children. Now they are older and can watch themselves, it is not necessary for the entire family to travel together just if we need to buy groceries. WHAT A RELIEF!! I am more than ready for the "parent of young child" part of my life to be over! These days both my wife and I drive Ford Focuses with Zetec engines and standard transmissions - cheap to gas, cheap to repair, and a lot more fun to drive.
One last word about auto disposal in year 2012.
Every year, crashes and floods and failed powertrains produce a lot of vehicles that are not economical to repair. Also, in recent years, Carfax and a more educated buying public has made it much more difficult for dealerships, even used car dealerships, to pass off cars with major problems. So you might think that it would be a buyers market for used cars with problems that qualify as project cars and the prices of used cars would have collapsed as a surplus of them flooded onto the market. What has changed though is that steel prices are very high now, so scrap steel means a car that sold for $125 for scrap 10 years ago sells for $450 now - and that's just if it's going straight to the crusher.
This has put a huge crunch on the working families who cannot afford new cars, and cannot get credit to buy newer used cars. They have created a huge market for used auto parts as they struggle to keep their older vehicles running. In my view, anyone disposing of used cars should try to sell them to people who are actually going to take them apart and sell the parts, instead of making a quick buck by hauling them to a traditional wrecker. Quite often, gifts to "vehicle donation programs" simply mean the cars go direct to the crusher. Sales to individuals who are just going to resell them to the crushers often bring in less money to the vehicle owner than sales to wreckers or individuals who are going to sell the parts. And, the very best way to find places and people who will part these cars out is to list them as "used-up" cars with problems - and sell to the highest bidder.
In general there's 3 types of consumers of "used up" vehicles. First are traditional wreckers, these are the places that people bring cars to that have been involved in major collissions. Often they are long term vendors for impound and tow lots, and auto auction lots. You can usually tell these places because they have large piles of stacked up cars in them. They get so many cars in they just barely keep ahead of the flow so they quickly crush them and send to the steel shredders. Next are the self-service wrecking lots, if you see pick-and-pull or u-pull-it on the lot name that's a self-service. These places are always looking for cars to buy but they don't buy wrecks, they want complete vehicles that are intact. Last are the individuals who "part out" cars either for a living or to make extra money. The second 2 places scan the craigslist adverts and other cheap adverts and advertise for cars. That's where you want to take your old cars particularly if they still run.
Summary
Would I recommend someone else buy a van like this and do this kind of project, or would
I do this one over if I knew before I started what I know now? That is a difficult question.
For starters, this van had a serious flaw in it that I knew about before purchasing, but
I didn't think would be that important. What it is, is that this van had
been in a collision before, one that was strong enough to blow both airbags, and this did
some front end damage and caused the engine and transmission mounts to be misaligned within
the body of the van. This causes the AWD driveshaft to be out of alignment, which initially
made the vehicle vibrate so badly it was almost undrivable. I have compensated for this
with a LOT of shimming of the motor mounts, and got the alignment much better than it was. This
took care of the vibration for the most part, but there's still enough misalignment
that there's a resonance vibration that creates an odd moan that shows up at about 45Mph
and disappears at about 50Mph. This kind of damage is easily repaired in a laser frame
alignment rack, but it is pointless to pay for that when I could have probably found another
minivan with the 3.8L and a blown tranny, for $200, that had not had such damage.
If I had known of the extent of the damage before I left to
drive to where the van was being sold, I would probably have not driven up to see the van in the first
place. I would have still done the project, but just with a different van that was closer
and hadn't been in a collision.
In the long run, however, the $64,000 question is how much mileage is left in the engine.
In 2005 I said
If I am able to get another 50-75K miles out of this van, it will have been worth it.
In 2012 my ultimate cost for this turned out to be about 5 cents a mile and I now have
something different to say. That is, whenever doing a project like this you should
be mindful that the future changes and you cannot forsee those changes. You see, I could have very likely back in 2005 bought
a van that only had 50K miles left in it for less money than I spent then. Back in
2005 I was a different person - my transportation priorities were different - and in
retrospect, they were short-term. At that time I was thinking that if I really understood
this van intimately I would be able to keep it running long enough to be in the family
for my kids to learn to drive on, and for it to be a spare van for the family, etc.
I did not forsee the incredible run-up of fuel costs or that my driving needs would
be what they are today. In other words, buying a vehicle for the short term - for maybe
the next few years - is more often better strategy than for the long term.
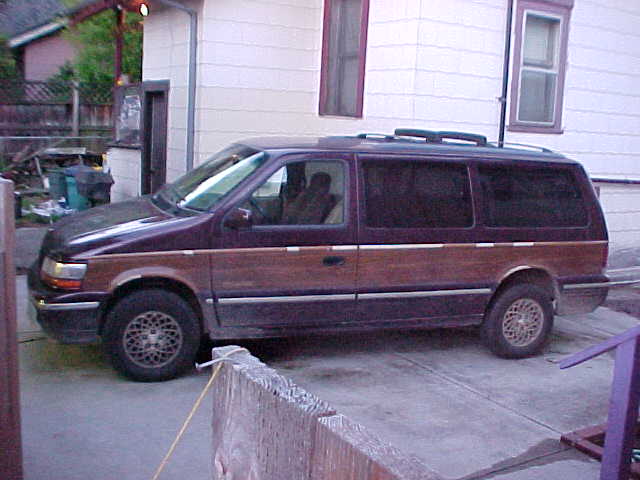
So, what kind of minivan does $200 buy? In this case a 1994 Chrysler Town & Country
AWD with about 140K miles and a blown transmission. Plus, a whole lot of other things
broken that I didn't know about until after the project was finished. But, at least they
put it in a crate for me. :-) Notice the fine pantina of mud around the wheel wells, this van
has seen some off-road duty. Now we know why the transmission is blown. Some
people don't understand that AWD isn't 4WD.
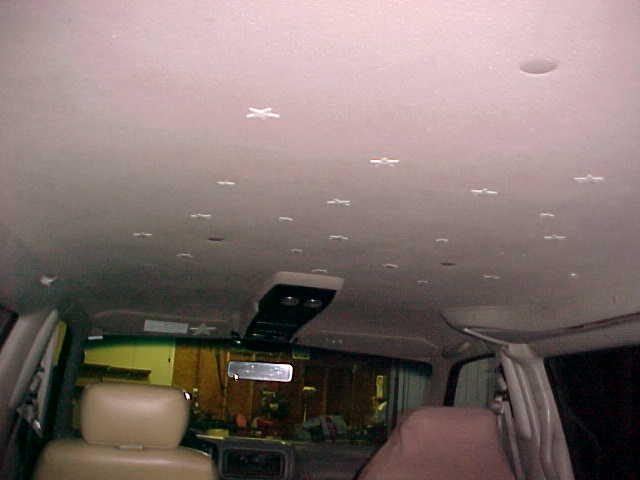
It is amazing what some people do to their vehicles. Fortunately, removing the stars
didn't destroy the headliner as they had used some sort of goopy sticky stuff that
never dries to stick them on. Notice also the fine seatcover on the passenger seat -
that seat gave meaning to the phrase "cat scratch fever".
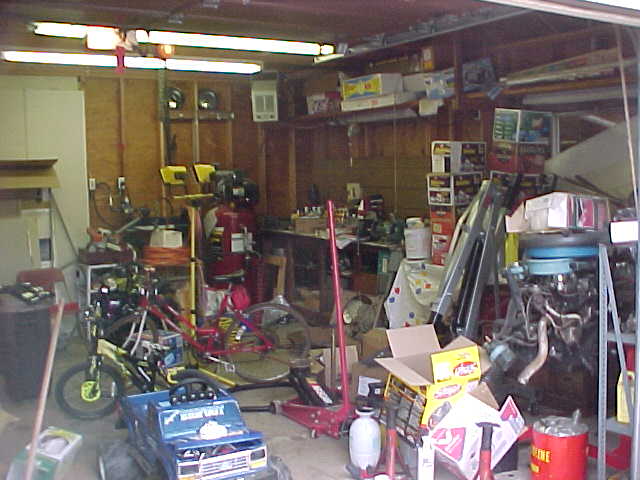
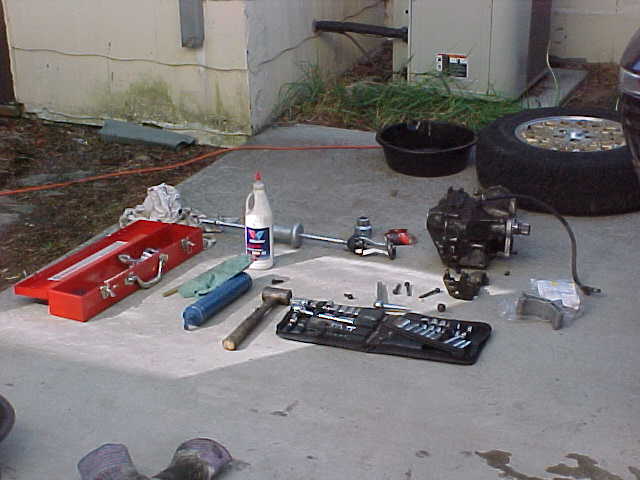
A project of this complexity requires a well stocked garage.
As my wife is completely uninterested in auto repairs, this is all mine, ha ha!
In the foreground you can see my next project, the blue truck, could it be Hemi material? ;-)
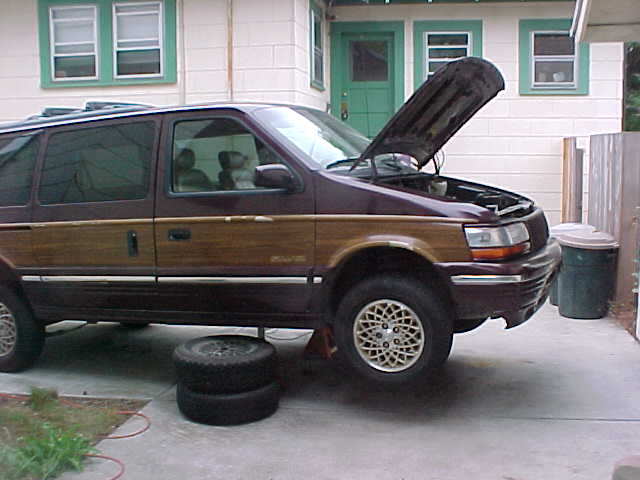
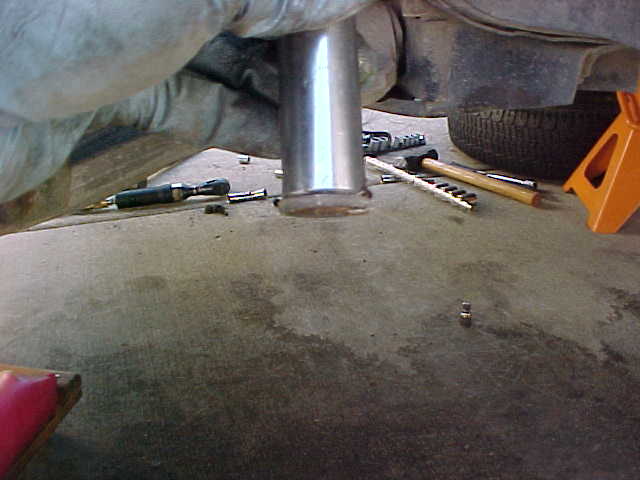
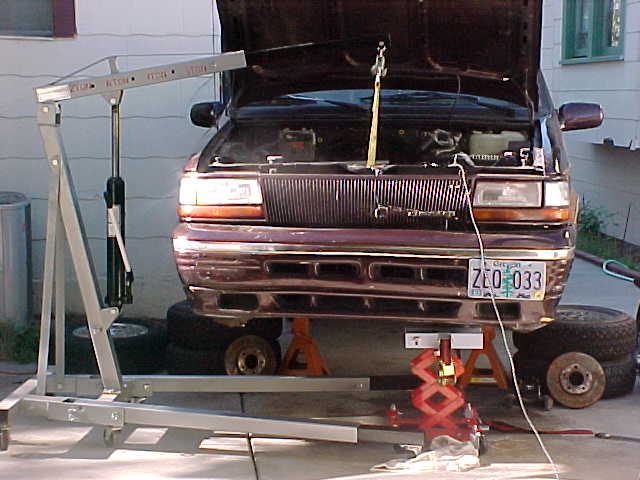
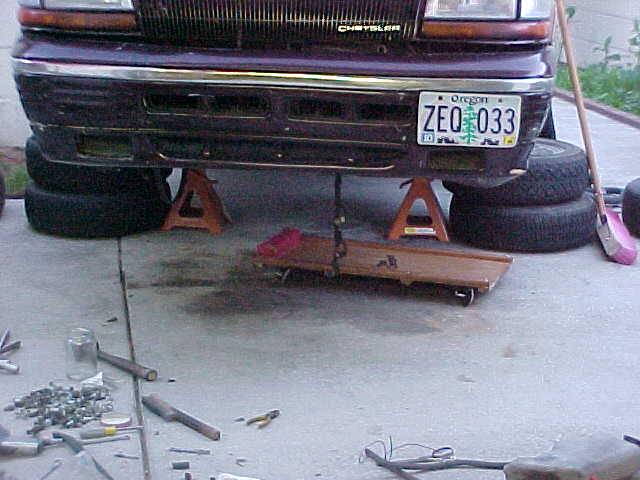
Here's the start of the project, with the van up on jackstands. As you can see it
cleaned up nicely. I actually jacked it up a couple days before starting the
project and spent an hour under it just spraying down everything with a garden
hose on full blast. At least 2-3 shovelfulls of mud came down off of it. Ugh!
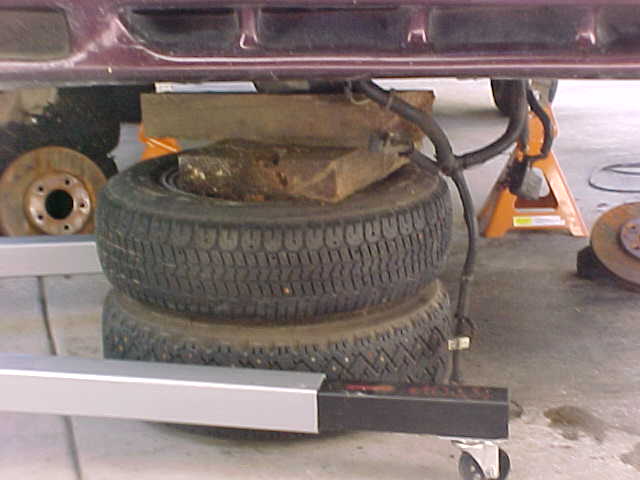
Notice the spare tires next to it, these are in case the jackstands fail while I'm
under it, it will come down on the tires.
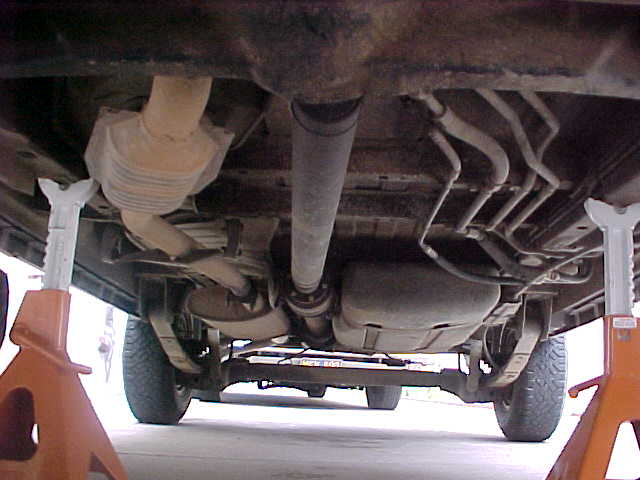
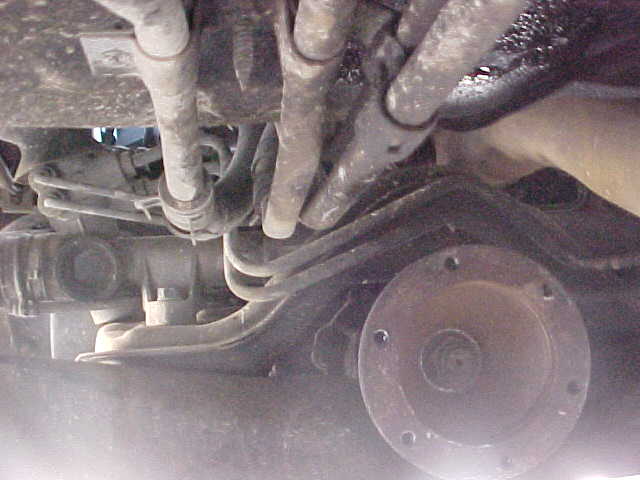
Here's some overview shots. Underside looking back, good view of the places used
to position the jackstands. Notice the driveline isn't centered in the crossmember,
this became important later on.
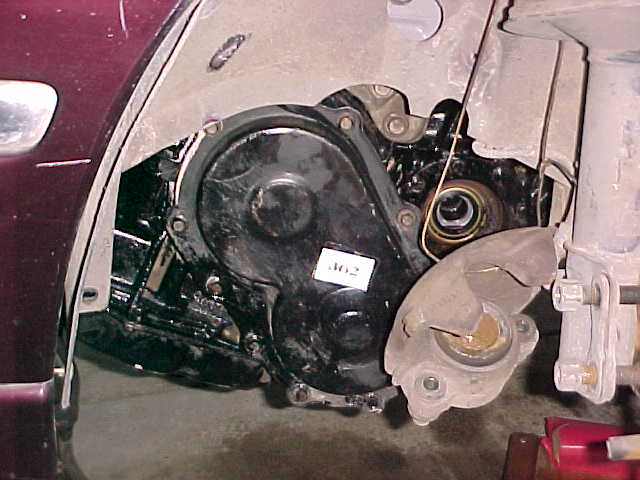
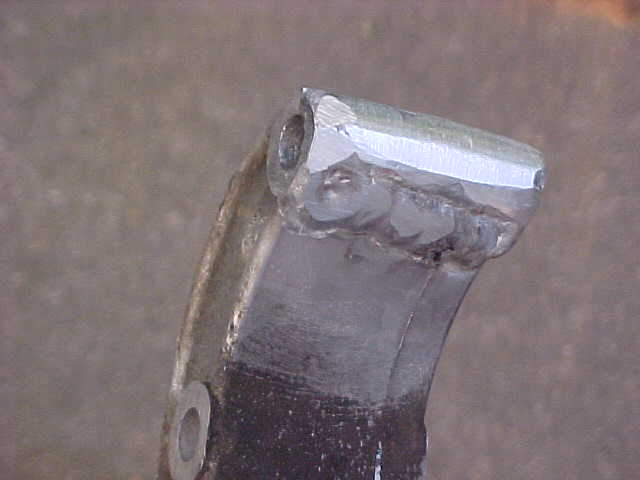
Underside looking up at the transaxle. Notice the previous owner bent the hell out
of the torque converter access plate.
Same view, a bit further back. The power transfer case is clearly visible.
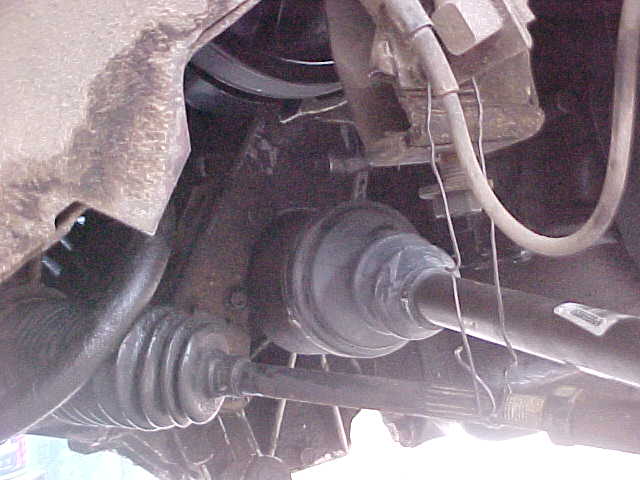
AWD driveshaft (Chrysler calls it a propeller shaft) it's basically the same idea as
the front axles, with enclosed U-joints. This is the front boot over
the U-Joint. As you can see the boot has failed and has slung grease all over the
bottom of the van
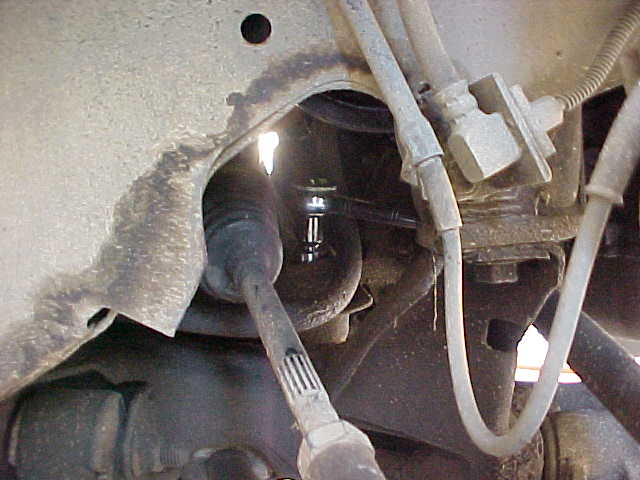
LH axle (drivers side) looking from the front up from below.
RH axle (passenger's side) looking from the front up from below
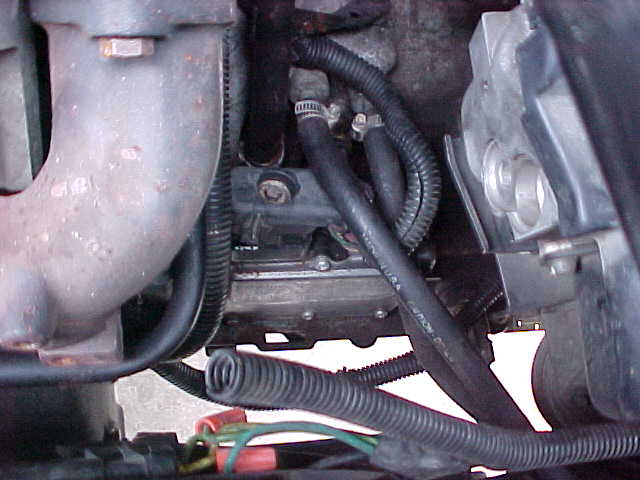
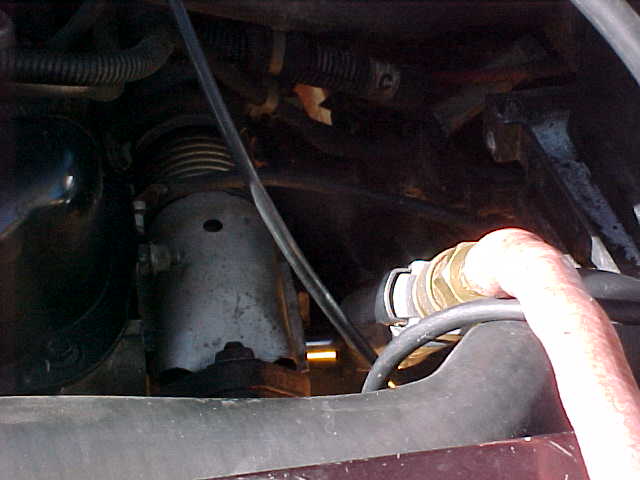
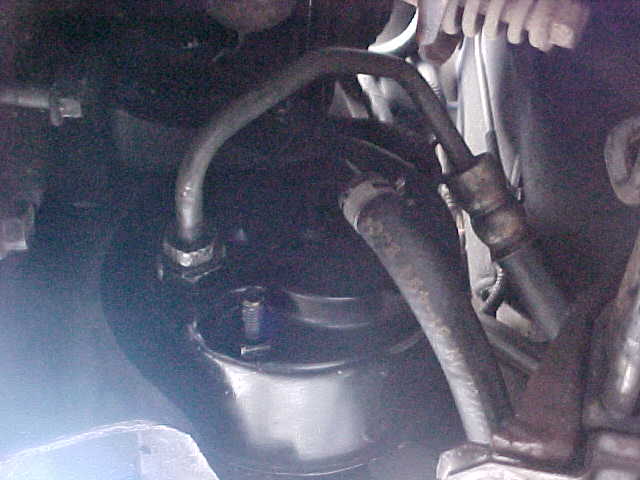
Top down looking down on the transmission selonoid pack. Notice the fine wirenut
repair the previous owner used on the front cooling fan. I eventually replaced these
with soldered connections, in shrink tube.
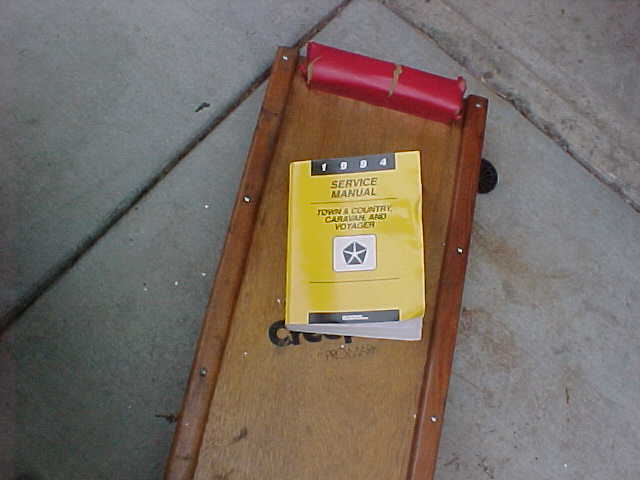
Factory service manual. If you don't have one of these and you attempt to do
something like this you are a fool.
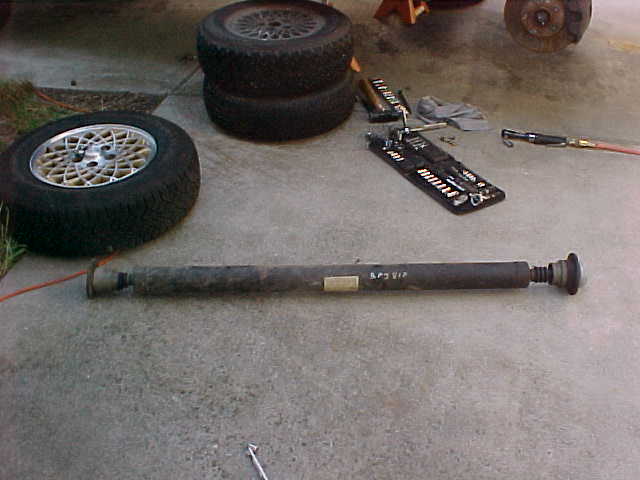
Here's the driveshaft out of the van. To get it out I unbolted both sides, then
used gentle taps with a hammer and chisel to convince the ends of the shaft to
separate from the power transfer case in the front, and the fluid coupler in the
back. Later on I replaced this with one from a wrecking yard that had intact boots.
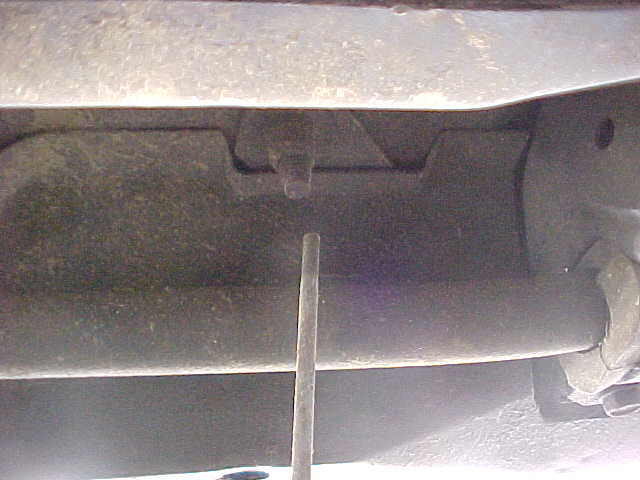
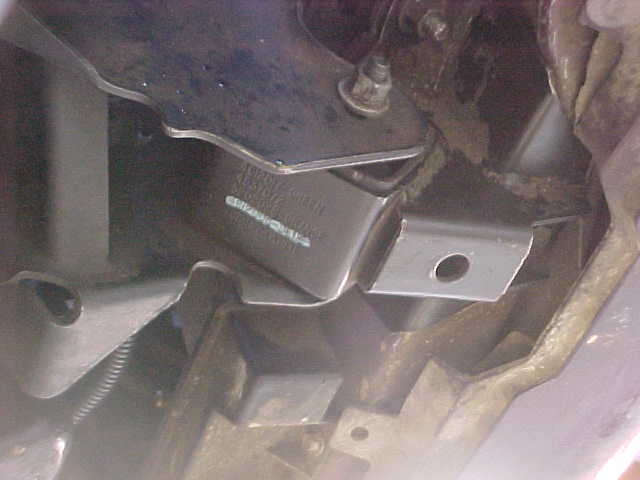
After getting the driveshaft out the next step is removing the crossmember which
you can see at the bottom of the picture. The horizontal cylinder in the middle of
the picture is the rack and pinion, which is bolted to the crossmember bridge, which
goes over the power takeoff from the power transfer unit. To make things more fun the
rack and pinion partially obstructs one of the crossmember bridge-to-crossmember bolts.
This is the RH front crossmember bridge to crossmember attaching nut. The nut is accessible
through a hole in the crossmember bridge. While it's inconvenient to lose the nut down
the hole into the crossmember (which is hollow) during the unbolting process, it's not
fatal since we are pulling the crossmember and we can get the nut later. However, watch
out during reassembly and take care not to lose the nut down into the crossmember bridge
then.
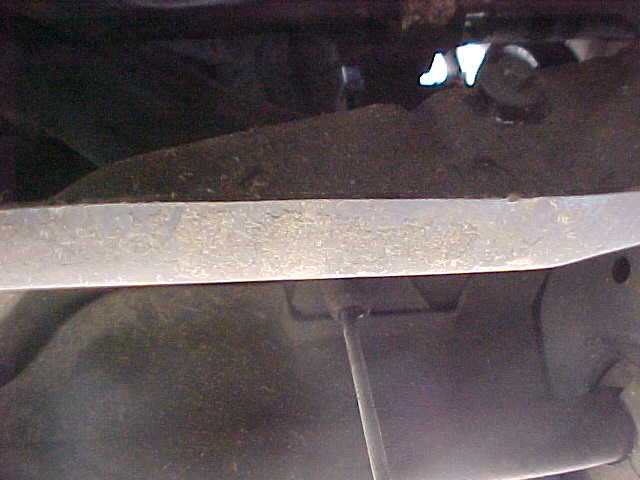
This is the LH front crossmember bridge to crossmember attaching nut. Notice that the
tie rod is wired to the van, this is done to help keep the rack and pinion from falling
out of the van later. In order to get at this nut the rack and pinion attaching bolts
must be removed so the rack can be pushed back about an inch. (a slight deviation from
the FSM) The handle on the socket wrench is going through a gap in the rack and pinion
steel lines. There is enough play in the rack and pinion that I suppose another way to
get this would be to unbolt the crossmember and let it drop about 6 inches.
This is an old trick. The crossmember bridge attaching nut stays in the socket, and
thus can be extracted from the hole in the bridge, because the socket has a glob of grease in it.
This is another trick. The crossmember bridge rear fastners are bolts that go down into the
crossmember, and have bolt heads that are recessed. The trick is to insert a rod into the
bolt hole - once the bolt is loose, you keep your socket held down on the head, and push it up
with the rod which keeps pressure against the socket,
and thus the bolt head stays in the socket and you can guide it out of the hole instead of it
falling down inside of the crossmember and getting lost.
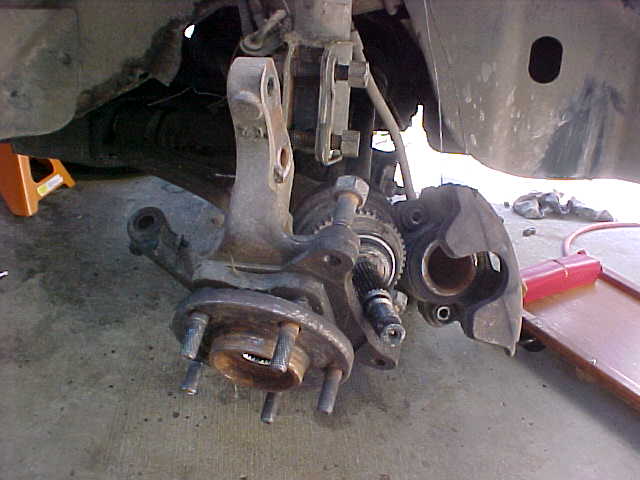
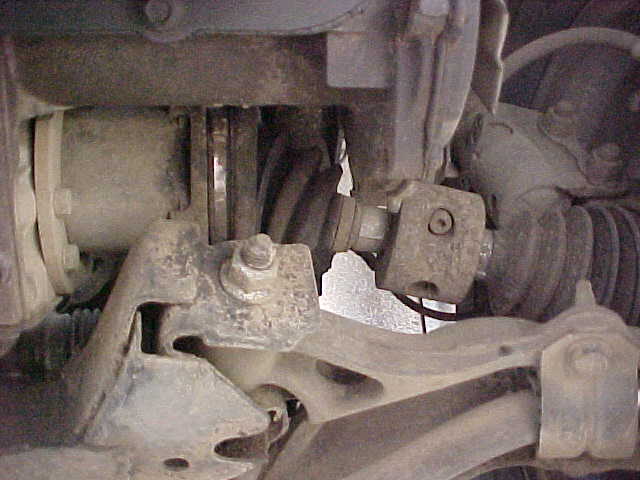
RH side axle. Here I made a deviation from the FSM. In the FSM they call for removing the bottom ball
joint in order to drop the crossmember, in order to get the PTU out. This is to preserve the
alignment since you lose alignment if you unbolt from the struts. However since this is
a used vehicle with no history I am asssuming it's already out of alignment, so I don't
care about existing alignment since I'm going to get it realigned anyway. Since getting the
ball joints separated can be problematic and we are
pulling the trans and have to pull both axles out anyway, I left the joint alone and pull
the half shafts now. Notice I didn't have to pull the wheel bearing to get the axle out on this side.
However, the axle cannot be extracted from the Power Transfer Unit without dropping the crossmember.
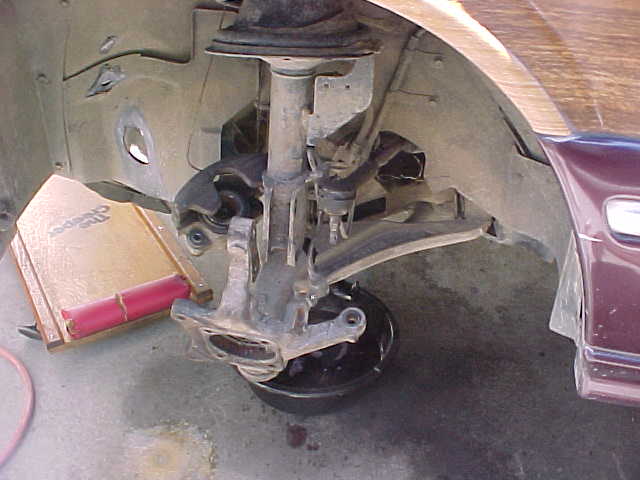
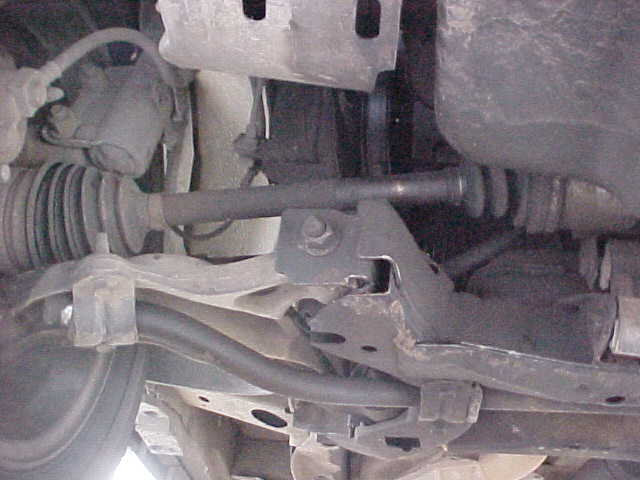
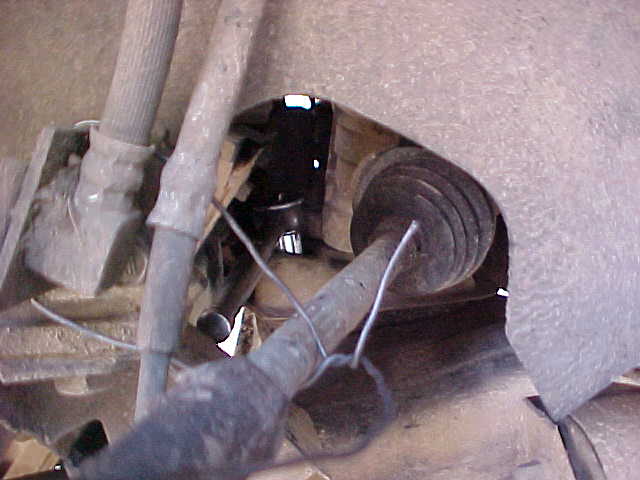
LH side axle, I was able to pull this axle completely out without dropping the crossmember, although I had
to remove the bearing assembly in order to get it out. Notice the catchpan, a considerable amount
of trans fluid comes out when the axle is removed.

With the crossmember bridge disconnected from the crossmember it is pretty easy to unbolt the
crossmember itself and remove it. I also removed the RH axle. Good product placement there on the
floor jack!

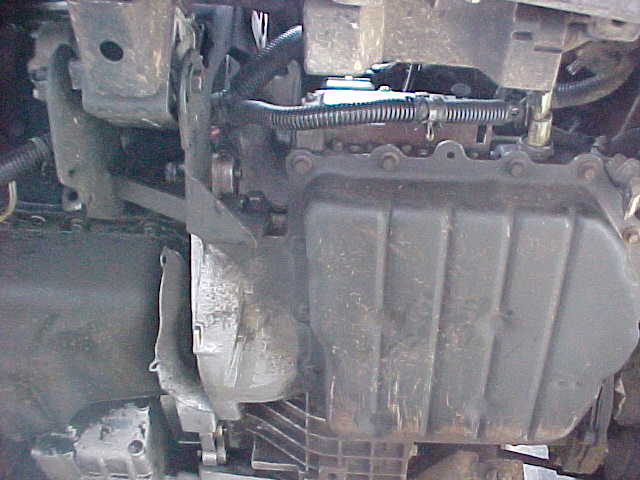
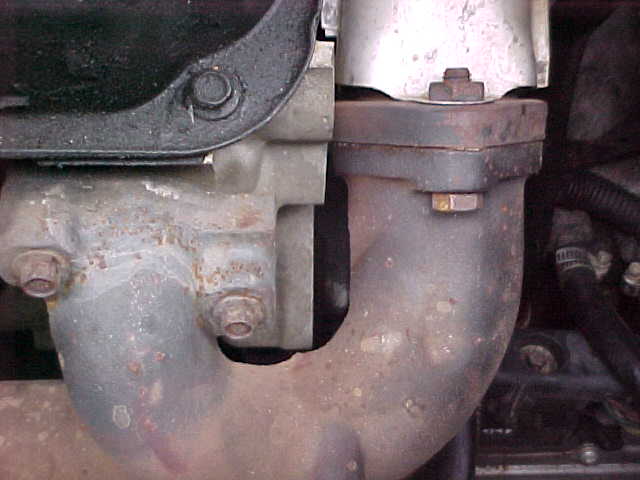
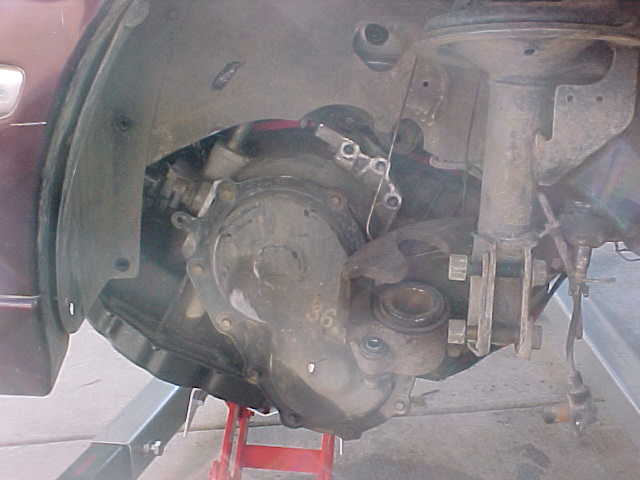
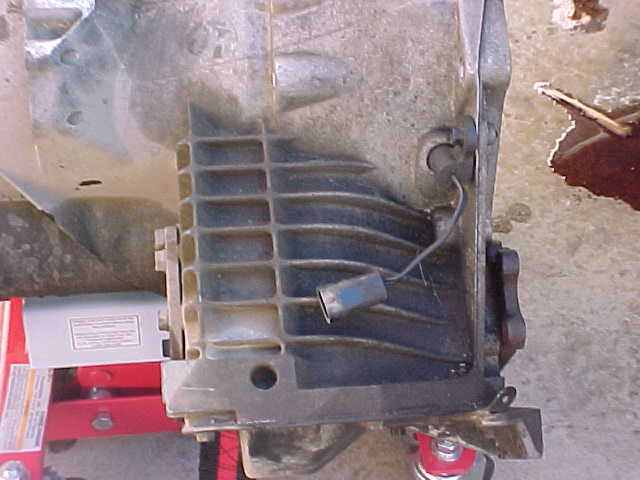
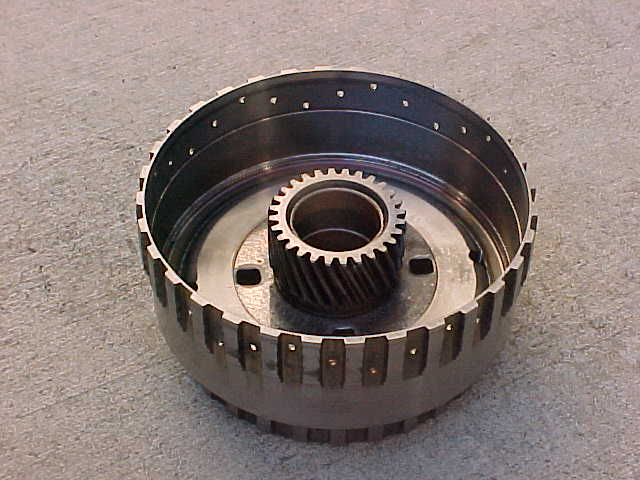
With the crossmember and axle gone, we can get the Power Transfer Unit out.
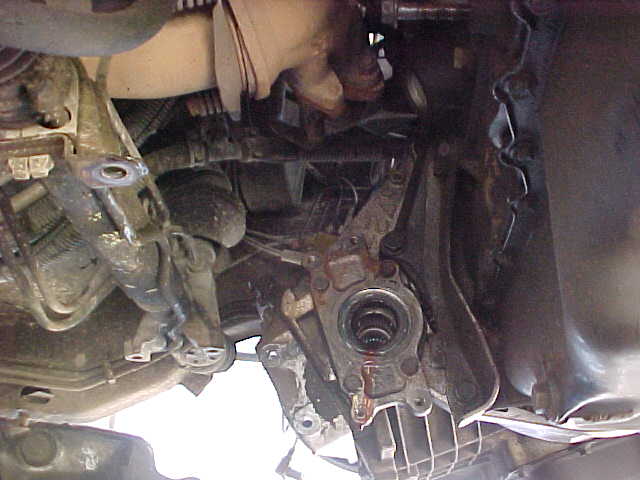
This is a view looking up at the transaxle where the PTU bolts in. There are 6 bolts that hold
it on here, and 2 others that go into the engine block.
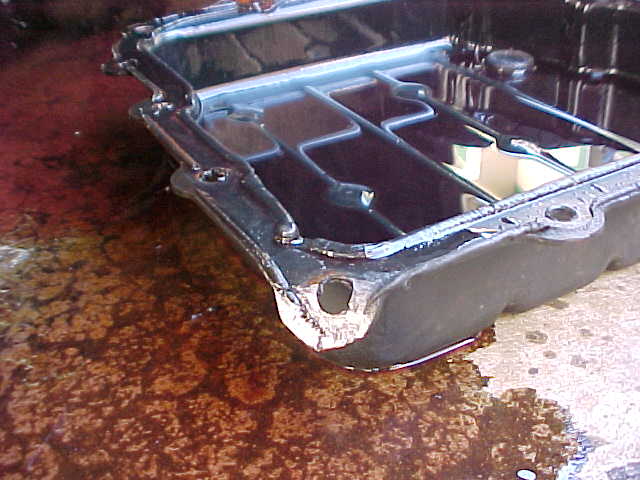
This is the results of the infamous "Chrysler transmission fluid shower" it is what the result is of using
RTV to "seal" (more like, GLUE) the transmission pan to the transmission. As I've had the shower
once before and didn't care to repeat the process, I was not underneath the pan when it and the
fluid came crashing down.

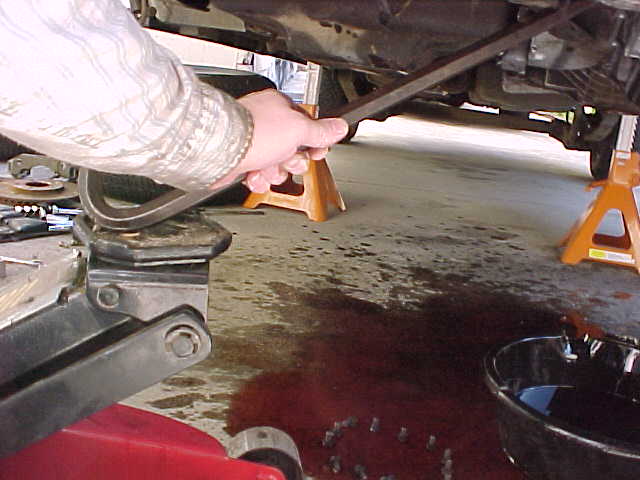
Here's how I got the pan off. Using a crowbar, I reach down from the top to the front RH pan tab
which sticks out a bit. I then hammered down on the crowbar which bent the tab down (rather than
making the pan come off, that RTV is stuck tight!) Then sticking the tip of the crowbar into the
gap made by bending the pan tab, and the engine mount as a fulcrum, I used the jack to apply force
to the crowbar to pry it off. The pan resists and the jack gets higher and higher, and the
pressure on the pan gets stronger and stronger until suddenly POP the pan snaps off and bangs
on the ground and a cascade of fluid comes raining down, far exceeding the pathetic reach of the
catch pan. This procedure results in a bent pan tab, easily fixed with a hammer, but more
importantly it does not scratch the aluminum mating surface of the transaxle.
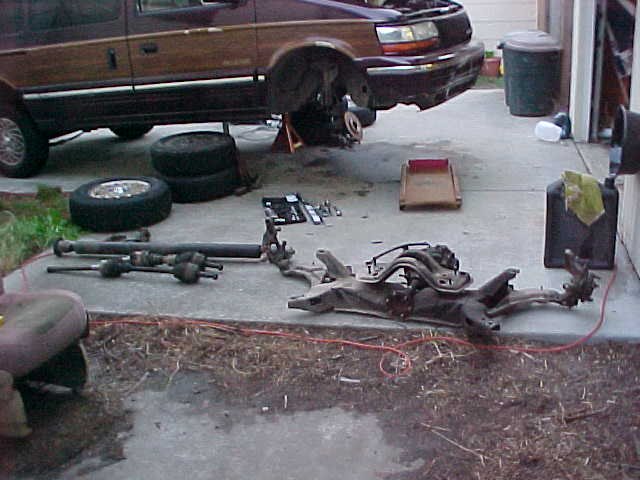
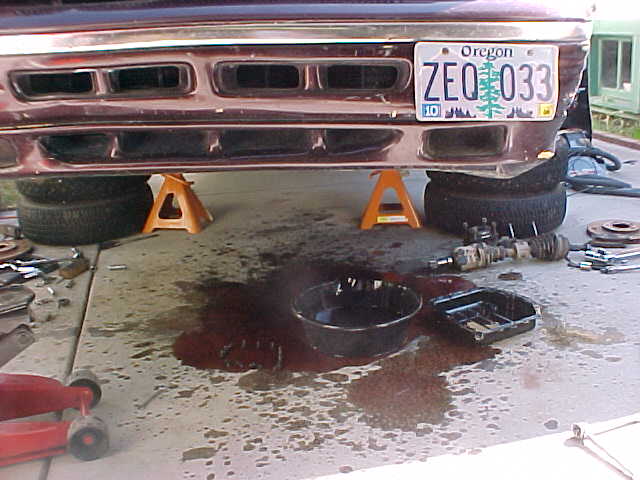
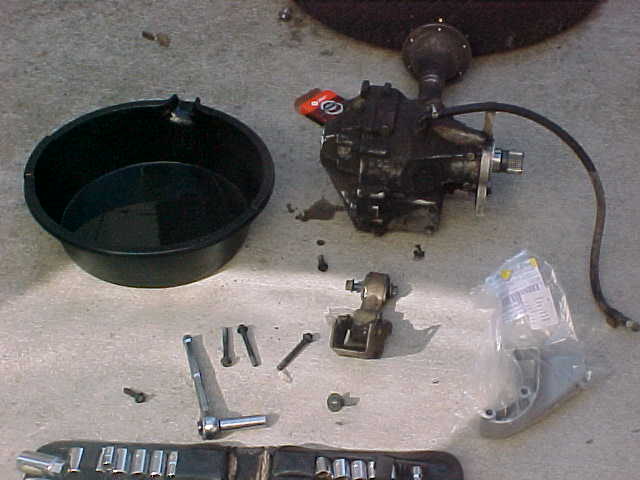
End of the day, the crossmember, PTU and Axles are out and set aside and the tools arrainged.
One other trick I have learned when doing these jobs is to set aside all tools used, that way
if I have to go to a wrecking yard to pull a replacement part, I know just what tools to take.
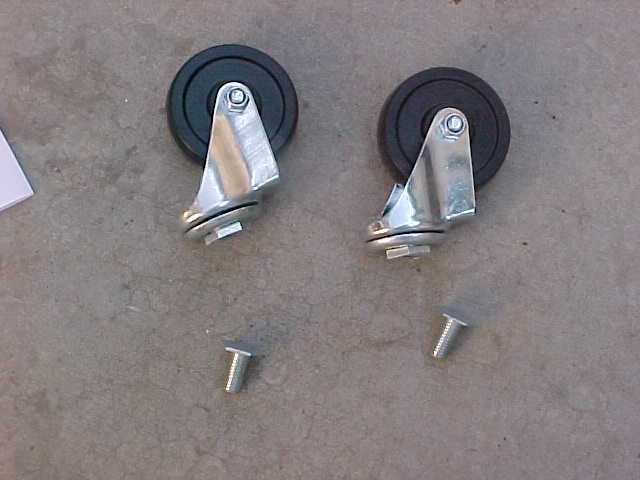

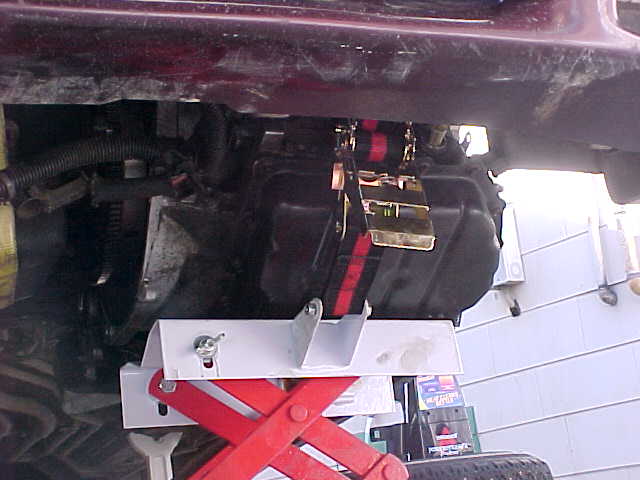
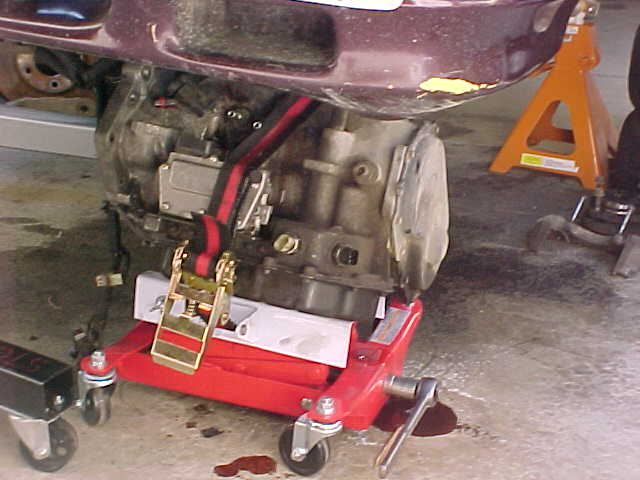
These shots are here because you really have to see them to believe it. I bought the transmission
jack I used for this job from Harbor Freight simply because it was cheap. (Hey, this IS a
$200 van after all!) These are two of the casters for this jack,
after I tightened them down to the jack. This happened BEFORE I even USED the jack for anything!
Needless to say I went back to them and got replacement casters. Professional mechanics that
see this probably will laugh and say that's what you get when you buy cheap tools.
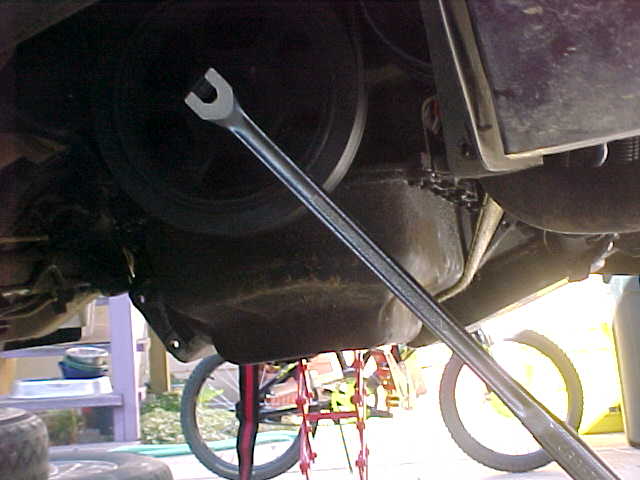
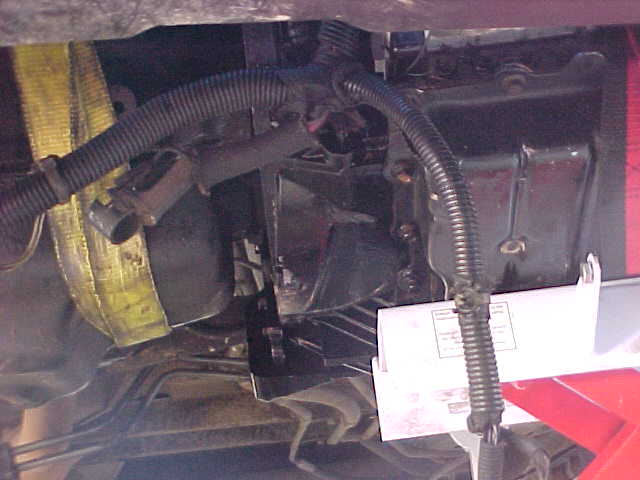
Unbolting the transmission linkage from the transmission
The bolt in the center is one of the 4 top transaxle bellhousing bolts. Clearance to get to these
is not the greatest, you have to go in under the exhaust manifold with a socket and extension,
but I've dealt with worse.
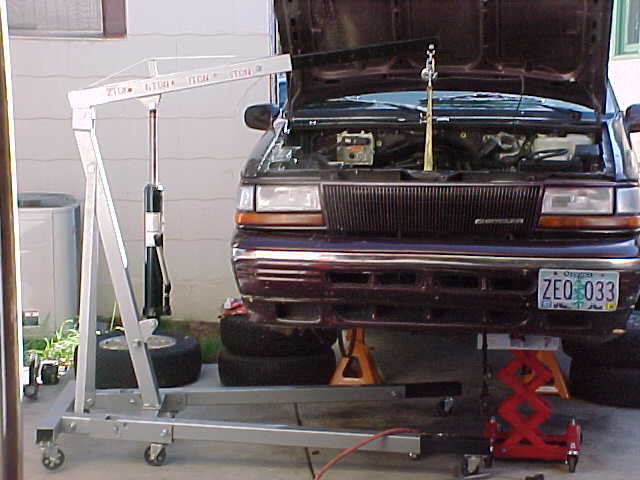
The manual calls for use of an engine support bar, however the cheapest one I found was $80, so
I decided to use my cherry picker instead. This proved to be a wise choise. At this point the
engine is partly supported by the hoist. The yellow strap is a towing strap. The transmission
jack at this point is there purely to check jack clearances and such, it is not holding up anything.
Removal of the first top bellhousing bolt. air tools make this job a lot easier! This bolt also
fastens the front engine mount to the engine and transmission so to get it out you have to use
the hoist to unload the shear force on the bolt.

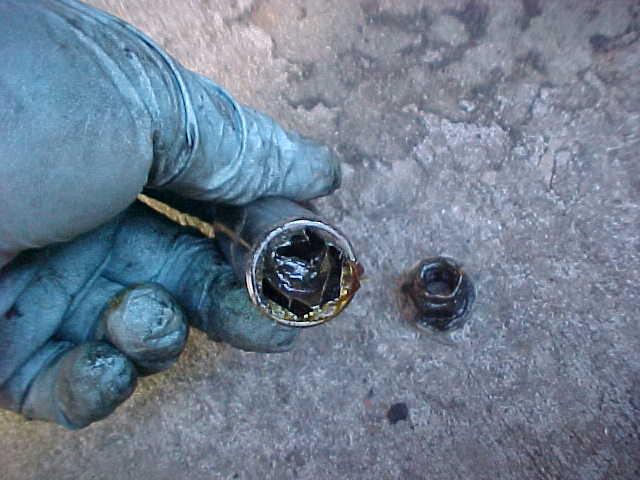
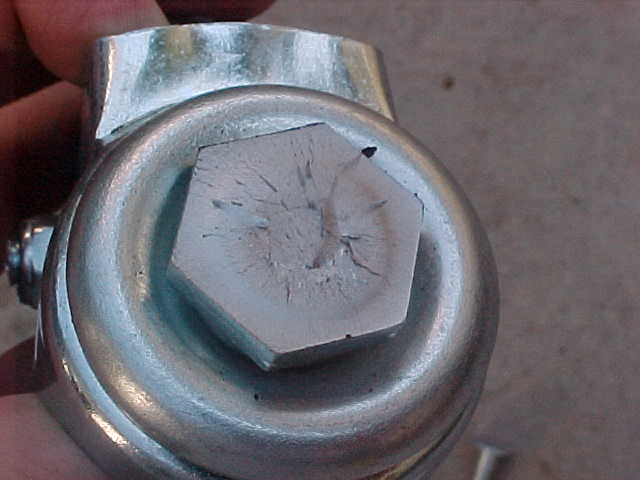
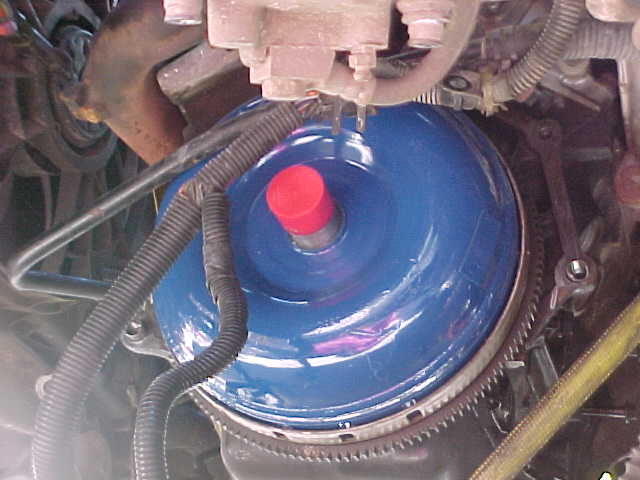
Removal of the 4 torque converter-to-flexplate bolts.
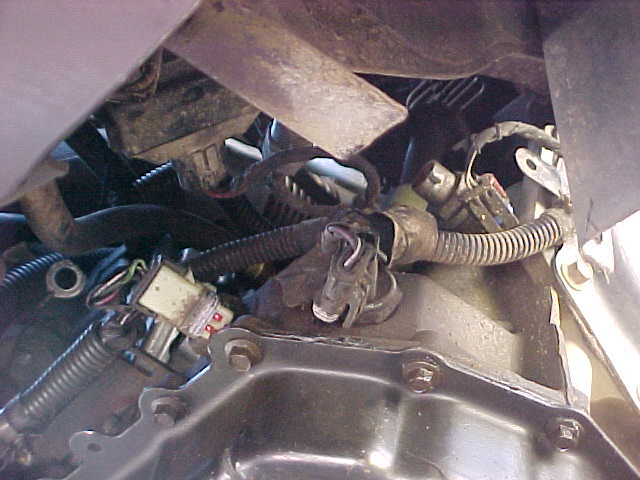
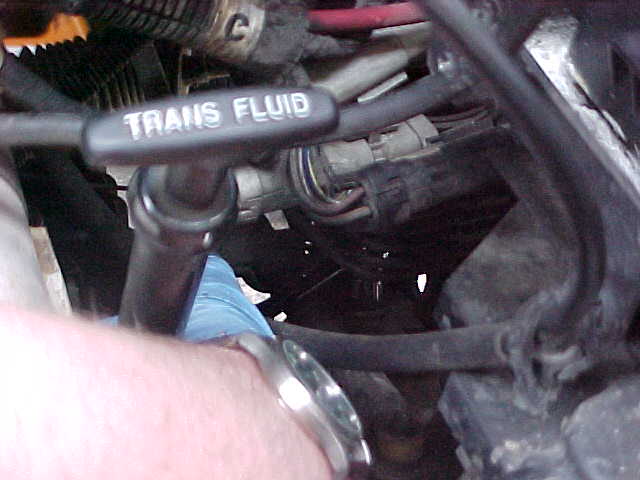
Wiring to the sensors is unplugged now. There are three in this picture, on the left is the
transmission range switch, the center is the park/neutral switch, the right and up a bit is
the output speed sensor. There are 2 other sensors on this transmission, an input
speed sensor, and a crank position sensor.
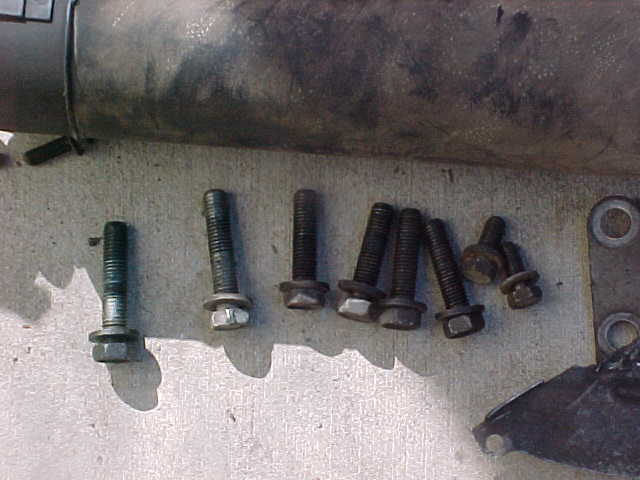
Transaxle bellhousing bolts, the two on the left are longer because they go the other direction
and thread into the aluminum bellhousing instead of the cast iron engine block. The
two on the right are mounting bolts that hold down wiring loom brackets on the top
of the transaxle.
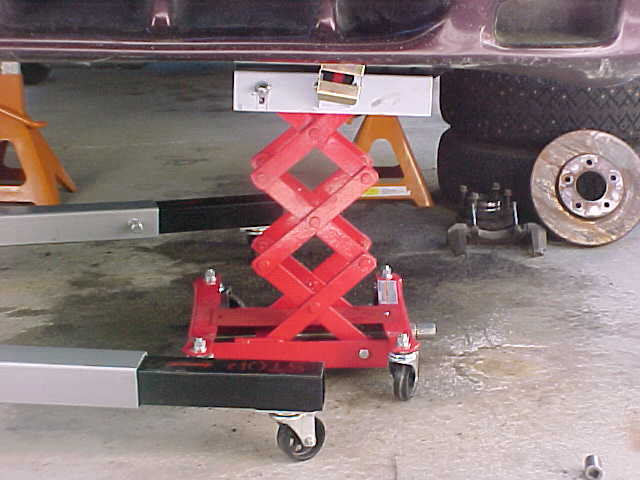
Positioning the transmission jack under the transaxle. I should have put it the other
direction with the lifting stud on the jack to the left, because of the way the transaxle
rides on the jack. Oh well, it worked coming out this way, at least.

Left hand side transmission mount, the three bolts hold the mount to the transaxle.
lowering the transaxle out of the vehicle with the transmission jack.
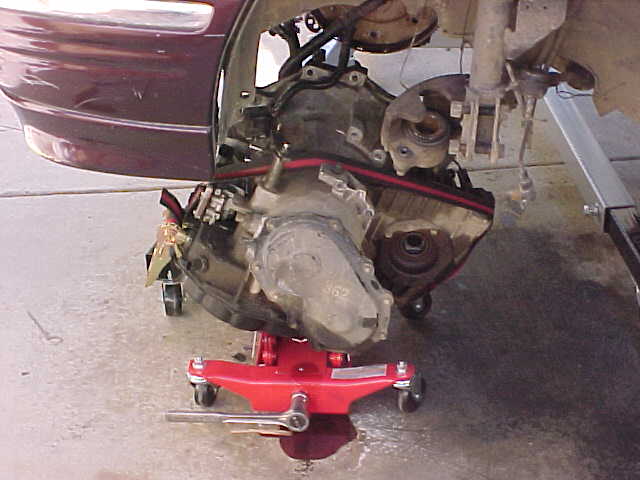
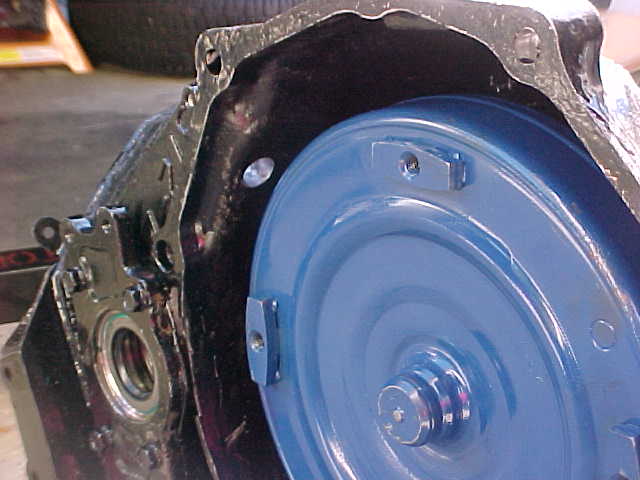
The transaxle is completely out of the van. Success!!!
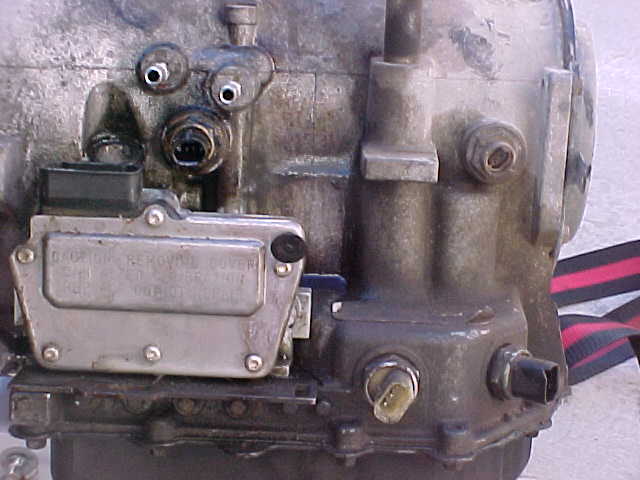
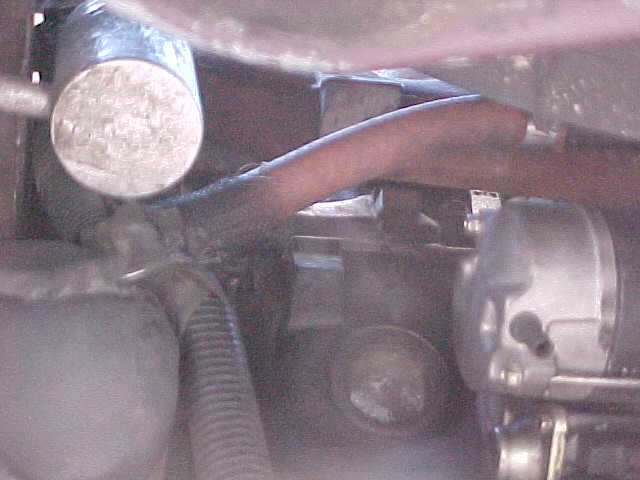
Side of transaxle showing the selonoid pack, the input and output sensors and the
range and park/neutral switches, and the input and outputs to the transmission
cooler lines.
Crankshaft position sensor. I strongly recommend replacing this. I didn't and within
3 weeks after putting everything back together, this sensor became sensitive to heat
and failed at normal operating temperature. This is apparently the most common way
these sensors fail. Since when these fail the engine shuts down, this part will strand
you.
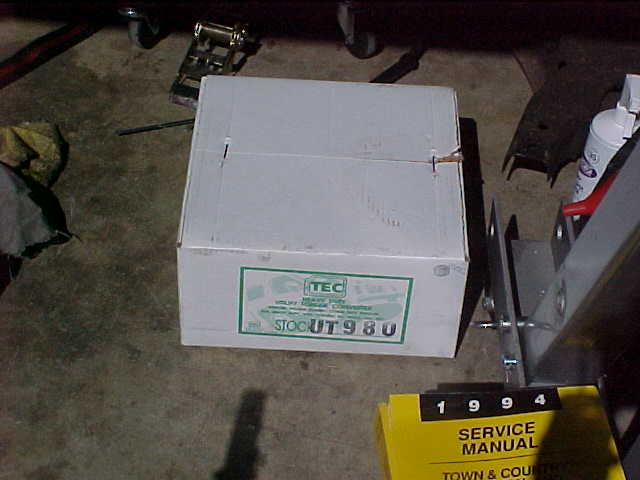
This is what the engine rests on while the transaxle is being rebuilt.
This is what broke in the transmission, the front sun gear assembly. Why did this
happen? Well it turns out that when the rebuilder, Transmission Exchange,
http://www.txchange.com/ got into
the transmission they discovered that it had been rebuilt once already. My guess is
that the front sun gear had been replaced during the last rebuild. Transmission
Exchange didn't volunteer anything but clearly the replacement gear wasn't up to snuff.
Total cost on the rebuilt transmission and new rebuilt torque converter was $1,400.
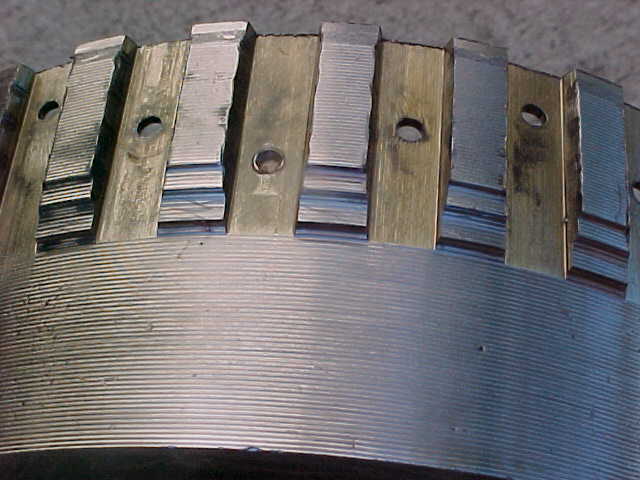
A closeup of the broken sun gear. Notice the indentations on each gear, these
should not be there on a hardened gear. The other gears in the transmission
showed no sign of this. Also notice the machining on this gear, the genuine
Mopar gears do not have this coarse of a finish to them.
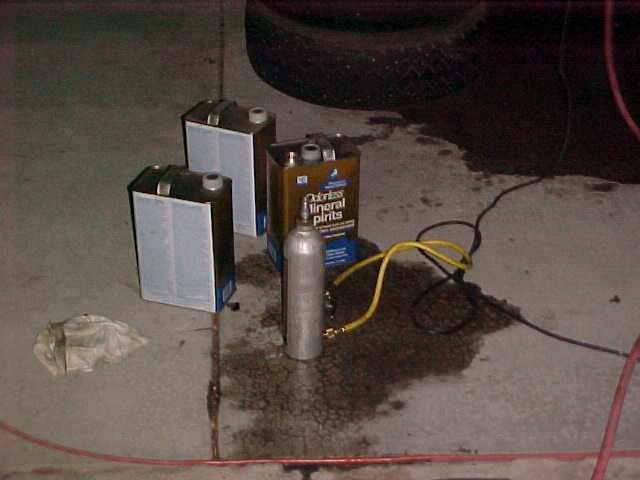
Before putting the trans back in I replaced the spark plugs (since the back ones
are easy to reach when the crossmember is out) and I flushed the two transmission
coolers, the one in the radiator, and the additional transmission cooler mounted
in front of the radiator. (good thing too as some metal bits did come out) This
is the setup I use for flushing, it's a pressure
bottle with a nozzle/gun that can be pressed against hose ends and such to inject
Mineral Spirits under pressure. One more reason that compressed air is a necessity
in the shop! The used mineral spirits is captured and I save it
and let it settle, usually after a year the particulates have settled out of it and
I can reuse it. When it gets too dirty I use it for washing parts.
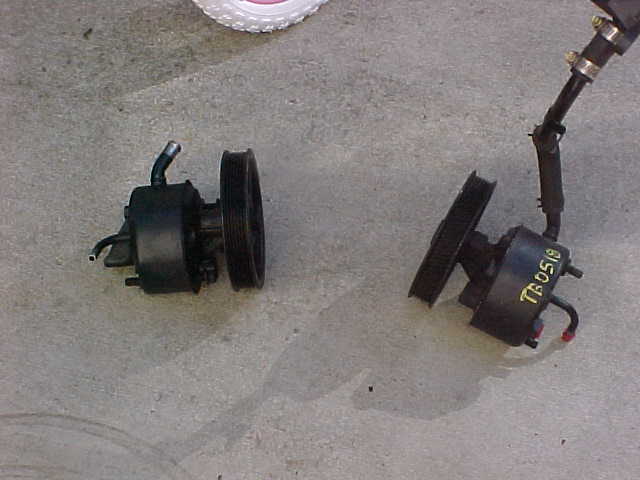
Another thing that I found was broken was the power steering pump, it was leaking
from the front shaft. I guess to highlight the abuse this poor van had received when
I took the power steering pump out I found it full of - you guessed it - automatic
transmission fluid. While new vans do spec ATF for the power steering fluid, this
vintage definitely does not. Now we know why the shaft was leaking, the ATF disintegrated the
seal. Fortunately it appears the rack isn't leaking yet, so I throughly
flushed the rack out with new fluid. As a rebuilt pump is $50 and you have to fool with getting
the pully moved over, and also I didn't want to spend the money replacing the
rack itself, I elected to go with a $30 wrecking yard pull. The one from the
wrecker is on the right. Pulling the leaking pump was a real bear. The pressure line flare nut was
frozen in the back of the pump. I had to completely remove the pump and let it hang
down by the line, then put the flare nut in a vise and tighten the vise down, then
use a long wrench on the flare socket in the back of the pump to break it free.
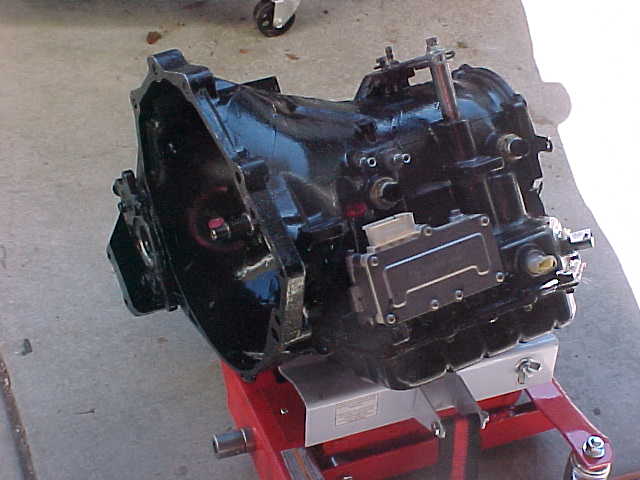
Here's the rebuilt transmission back from Transmission Exchange, resting on the
transmission jack. For some reason, probably to help cooling, Transmission
Exchange paints them black. If I had known this I would have requested it not
be painted, purely as a matter of personal preference.
Here's the Heavy Duty 10" torque converter that Transmission Exchange supplied with
the transmission.
Testing the fit of the torque converter. It should go on and off the flexplate
without binding, or having to hammer it on. The instructions with the converter
say to grease the pilot hole but I found that there was enough clearance to not
have to do that. At this time the flex plate that the converter bolts to should be
checked for cracks and worn teeth. (they sometimes crack near the crankshaft bolt holes)
The converter bolt holes in the flexplate should also be checked to make sure they
aren't out of round.

The transmission is cinched down on the jack and ready for lifting, the converter
is ready to install. It helps to get the transmission as level as possible during
installation. The converter is filled with ATF before installation on the
transmission, before doing this, reach down into the converter input shaft and center
the internal splined gears with a stick.
The converter installed in the transmission. Note the position with respect to the
crank position sensor hole. (install the sensor after the transmission is installed)
It's difficult to get it to completely seat on the transmission shaft, you have to
work it around and back and forth for a while before it will go completely on all
the way. You don't have to force it, it will just slide in. The converter
install instructions warn against installing the transmission without the converter
fully seated. Once the converter is seated spin it until the bolt holes are in the
same position that they are on the flexplate.
The transmission is lifted into position. It is really easy to get the engine
and transmission to mate together with this kind of a setup. The way I did it is
this, first let the engine down a bit with the cherry picker until the flexplate
is angled down. Lift the transmission up and keep it level until the top of the
transmission bellhousing is against the top of the engine, and there's a big gap
at the bottom of the bellhousing. Then give the cherry picker a bit more lift and
the transmission jack a bit more lift and keep lifting them together until the
engine flexplate is vertical, and both pieces should just go together smoothly.
You will have to grab the transmission and rotate it slightly on the jack for the
two guide pins to mate in properly. I used a compressed air impact gun to turn the
screw that raises and lowers the transmission jack, that is one of the secrets to
using this kind of jack effectively. If you try using a socket wrench you can end
up tipping over the jack. Make sure that the converter does not slip out of the
transmission during this operation.
A final bit of jogging to get the two parts to mate together.
Once they are together I bolted the bellhousing to the engine then used the cherry picker
and the transmission jack to wiggle the assembly into the right place to bolt the
LH transmission mount to the transmission.
The final piece
was using a floor jack to rock the engine and transmission back on the RH & LH transmission
mounts to be able to install the front transmission mount. I did replace that mount
with a new one but I don't think I needed to do that as the old mount looked OK.
But it was only $11 so no big deal.
Next is torquing all the bolts
to the proper torque, including the torque converter to flexplate bolts, and tying down
and reconnecting the wiring harness and the transmission will be in place. According to
the instructions from Transmission Exchange there should be about an 1/8 of an inch of
play between the flexplate and the converter, once the bellhousing bolts are tightened.
If there is too much, then correct it by adding shims, otherwise if there's not enough clearance, the
converter isn't seated into the front pump properly.
Otherwise, when the converter is tightened to the flexplate it will pull it too far out
of the front of the transmission, and it will whine. I had about 1/8 inch play in mine. The converter
bolts should be tightened down equally so as to not pull the converter into a bind. It
is also very important to adjust the shift linkage from the steering column to the
transmission properly, check the service manual for the procedure.
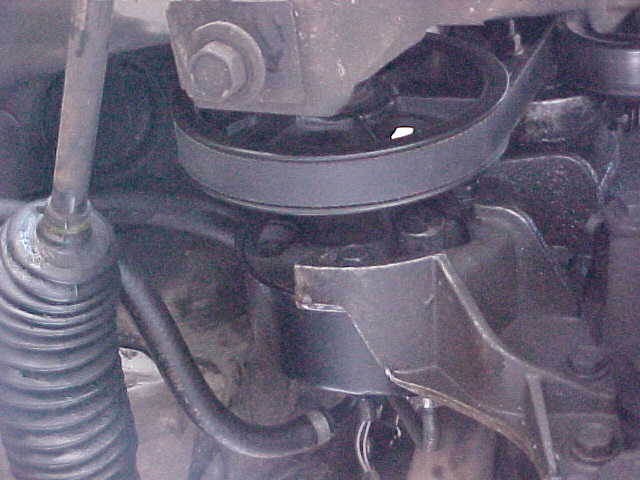
Here's the front and back of the installed power steering pump. I flushed the system
with the trick of putting a wheel on a die grinder and wrapping it with electrical tape
then pushing this against the power steering pully and running it. I plugged the return
line into the pump and filled the pump with clean power steering fluid and put the return
line from the rack into a catch pan, then ran the grinder to turn the pump and pump out
the fluid. That didn't get everything since I couldn't move the steering wheel back
and forth, but it got a good bit of the old fluid out.
One of the heater hoses that runs close to the exhaust manifold right behind the fan
had been touching the manifold with the result that it got a hole burned in it, so
I replaced it.
Since the Power Transfer unit is out and it does not have a drain plug, only a fill
plug, this is an excellent chance to drain it since you can tilt the unit to let
the gear oil drain out, then refill it with clean gear oil. Note that you will need
to check the fluid level again once this is mounted in the van - at that time, pump
in fluid until it's starting to drip back out of the PTU.
I've just finished pulling the axle seal on the PTU, since we have the unit out and
accessible and a seal is cheap, it's good insurance to replace it to prevent a leak.
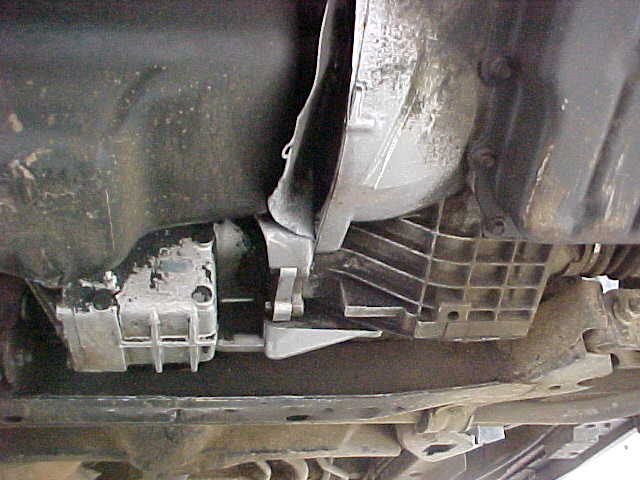
After the PTU was mounted to the transmission I went to install the replacement PTU
support bracket. Surprise - the replacement PTU bracket that Chrysler sold me, while
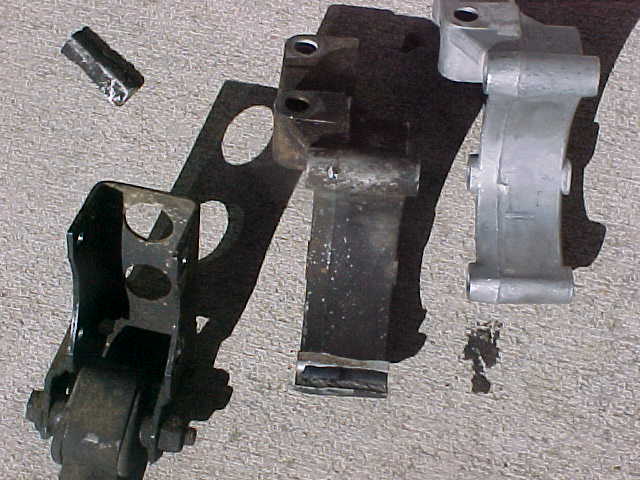
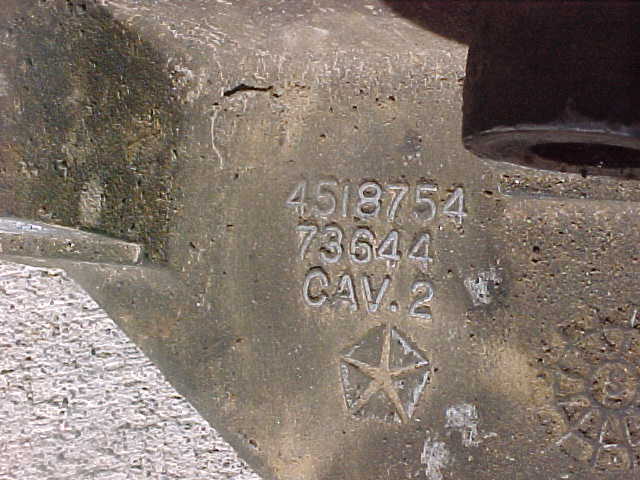
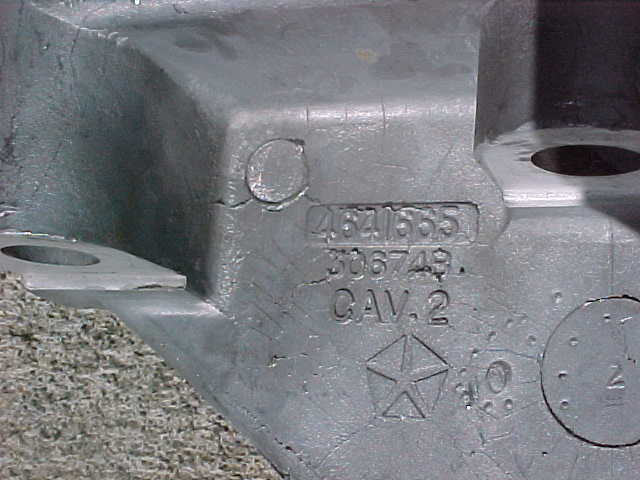
coming in a bag marked part# 4518754, for 1991-1996 vehicles, was actually part# 4641665
which is the PTU bracket used for 1997-onward AWD vehicles! Needless to say I was quite
wroth considering that this problem stopped me cold, and I had to abandon further work
on this for the weekend. On Monday I took the wrong part back and after 2 days received
further bad news - every single part in Chrysler's inventory listed as a 4518754
was a re-bagged 4641665. Chrysler hadn't got around to marking the old part as Not
Available in their inventory. As you can see the newer part, while the same casting, is a
wider part. My choices were to modify the steel bracket, modify the new part, get the
old part welded, or find the old part in a wrecking yard. I was not about to spend $60
on a new part that was wrong and would have to be ground down. I had already rejected
the wrecking yard idea because a yard is going to sell the AWD transmission and PTU as
an assembly and would not want to separate them, and even given finding an AWD in a
U-Pull It, we are talking hours of time to pull the crossmember and get to the
transmission and PTU bracket, which might be cracked anyway. So, after returning the
new part I went looking for a welder.
Here is the welded PTU bracket. I got ACME welding in SE Portland to do it. And
I was not particularly pleased. For starters they charged $50, $10 more than they
first quoted. Secondly the welds don't follow the cracks exactly, the inner weld
wanders off. In any case they did the job wrong. The should have built up the end
with welds then shaped it and redrilled the hole. Instead they just welded the casting
surface, with the result that the crack is still present inside the bolt hole. This
leaves a weak point and it will almost certainly crack again. I would have been better
off just buying the new part and grinding it down to fit.
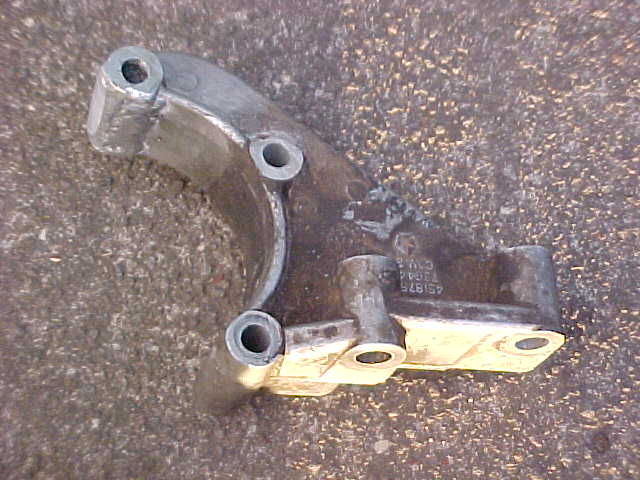
Here is the side view of the PTU bracket after it's been bolted back into the van.
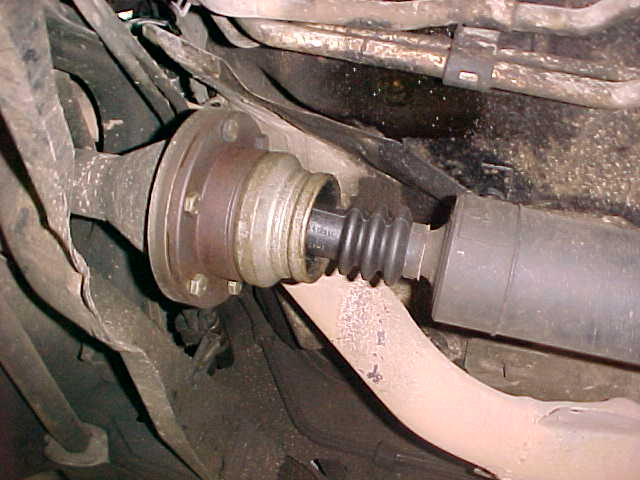
Now what is left is installing the axles, then lifting the crossmember and bolting
it back in, then putting the brakes back together. I replaced both axles with reman
units since I had them out.

One important thing that needs to be done with a rebuilt transmission is telling the
transmission computer to QuickLearn the transmission. The OTC scantool that I have
here can do this with the Pathfinder 96 cartridge that is loaded in the scanner.
This procedure erases the learned clutch volume numbers, and has you shift the transmission
into several gears, while holding the brake down. the computer then learns a set of
default CVI numbers and uses these as a baseline to start with.
A final picture of the vehicle after everything is done and before the test drive.
Why is it that these projects always last all day and end late in the evening!?!?
The test drive revealed a number of problems which took me several more months
to get time to fix. These are documented a bit further on. However one problem
that I did know about which was top priority to repair, was to fix the airbags.
I had guessed the airbags deployed because I could see when I bought the van that
the passenger's side dashboard was torn up next to the airbag. I replaced that
dash piece with one from a wrecking yard that had the same interior color.
What I HADN'T guessed was that whoever "fixed" the dashboard, didn't even REPLACE
the airbag behind the dash! And rather than just leaving a gaping hole, they
carefully removed the door from the deployed bag, and stuck it back into the dash so
it wouldn't fall out, to make it LOOK like an airbag was present. Needless to say,
the Air Bag warning lamp had been removed from the dash. I was able to get a replacement
passenger air bag from the wrecker who had the passenger dash.
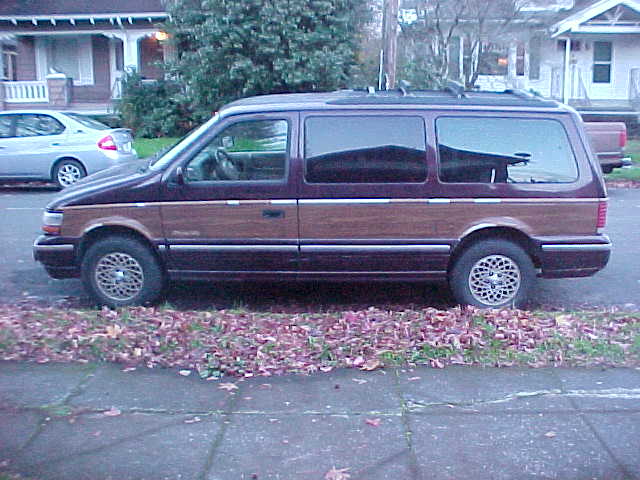
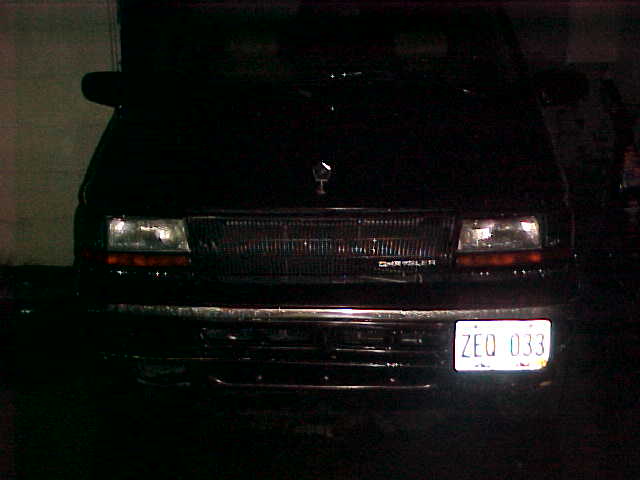
Here is a picture of the minivan taken in November, 4 months after I bought it. I've
just completed repairs to everything except for the air conditioning. That project
will have to wait until next summer.
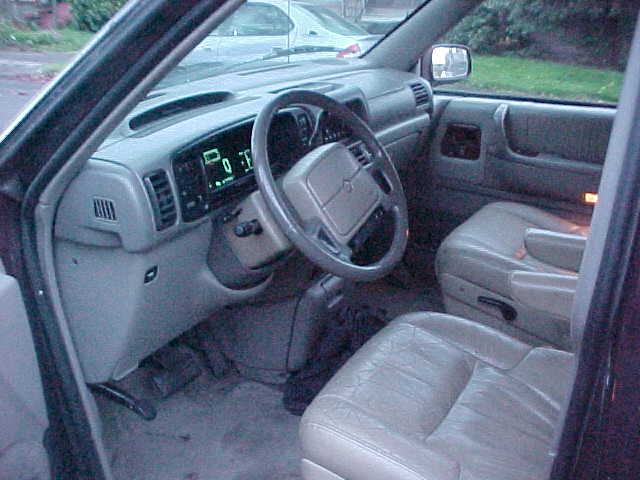
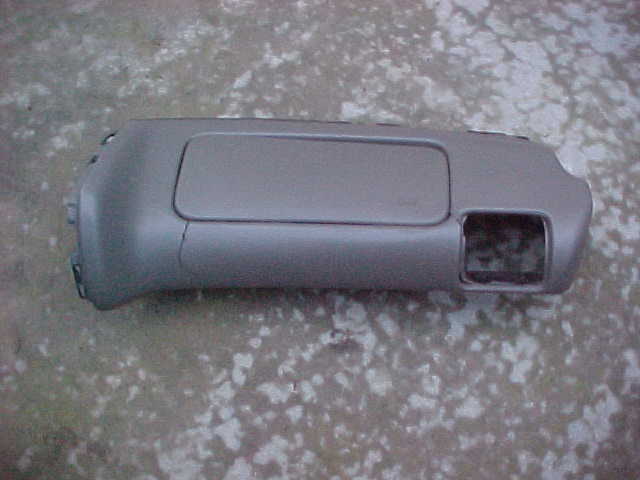
Interior shot of the repaired dashboard and front seats.
This concludes the pictorial.
As I mentioned previously there were more things broken in this van that I had to
repair. A complete list of these are as follows:
1) Body & frame misalignment in engine compartment (I somewhat fixed by shimming)
2) One of the previous owners had been a smoker, and the surfaces of the van all needed deep cleaning.
3) Both captains chairs (second row) were missing, I replaced them with another bench seat (fortunately leather, and fortunately the right color)
4) Tire changing jack was missing and had to be replaced
5) Serpentine belt was shot
6) Breather hose on engine was split and front coolant overflow bottle mount was broken, replaced both.
7) Battery shot
8) Rear wiper motor seized
9) Rear wiper fluid resivor bottle and washer pump missing
10) Fuel level guage not working
11) Front winshield washer bottle level sensor failed
12) low note horn missing
13) crankshaft sensor failed, replaced both crank and cam sensor.
14) A number of the fuses used the van had been replaced by ones that were the wrong rating.
15) ambient air temp sensor failed
16) radio missing as well as all speakers
17) Manifold to Brake booster vacuum line split and leaking (leak not visible in the front)
18) heater control valve leaking
19) Front wheel bearings noisy (regreased and rotated bearings to quiet them down)
20) Front bumper not properly mounted to the front of the van
Here's a bit more detail on some of these:
The body & frame misalignment in the engine compartment initially caused
severe driveline vibration, my first test drive was like driving the world's largest
dildo. Worse was that the rear AWD driveline that came out the PTU would bang down against
the crossmember on every accelleration, even light ones, and also caused terrible scraping noises and
massive vibration transmitted to the van interior.
The fuel level was not reading on the dash. It was not working at all and showed the tank
always empty. I pulled the tank and pulled out the fuel pump. On the AWD the sender is on the side. It
is a Carter electric fuel pump used in these and the sender's part# is Carter -73 0337 if that helps anyone.
What I found is that on mine the sender had worn slightly. As a result when it was in use the wiper arm on
the sender that wipes against the rheostat was pulling away from the rheostat. I took two safety pins and using
the sides of their pointed ends I carefully bent the wiper near it's hub so that it pressed closer to the rheostat
plate so that it would make contact all of the time. Then I reassembled everything. So far it's working, knock on wood.
Pulling the fuel tank is a rather nasty job. The fuel tank collects dirt and dust and when you get under it to disturb it
all that dirt showers down on you. And getting the quick disconnect fuel fittings apart on an AWD is a bitch due
to limited clearance. I found that using a cheater bar on a flare wrench with a block of wood as a fulcrum
I was able to lever the wrench sideways so that it was pushing on the quick disconnect with enough force
to make it come apart. I was actually having it push on a plastic grommet that is sold for the purpose of
pushing apart the quick connect fittings.
It's almost impossible to drain the tank, once again due to clearance. There is a drain hose that is capped
off and if you remove the cap and suck on that the gas will come out, but the drain hose is stuffed
up between the tank and driveline and is very short. I simply filled a 5 gallon gas can
half full with gas and then just drove the van normally during the day until the van ran out of gas, then put in
a gallon or so of gas then drove the van home. I didn't trust the draining procedure in the manual so I did
this in preparation of working on it.
The air conditioning wasn't working because the front condensor unit was completely missing. I bought a
replacement front condensor, replacement receiver/dryer, air conditioning lines, and replacement compressor
from a wrecking yard. I crossed my fingers and reused the compressor in the van rather than replacing it
with the one from the wrecker, and that worked out great, fortunately.