The Focus is a fun little car to drive if your lucky enough to have a model with a manual transmission. But, the downside of doing burnies at the stoplight and chirping the tires when shifting into second is that the car will go though clutches in short order.
One thing that helps is buying an aftermarket clutch - the aftermarket clutches are wider and the clutch material is wider so they should wear longer - the downside is that unless the flywheel is smooth it will have to come off and be resurfaced.
My Focus started out life as a manual transmisson vehicle with the awful 2.0L CVH/SPI SOHC engine hitched to it. That engine likely dropped a valve seat and grenaded itself in short order and the previous owner was smart enough to drop in the Ztech 2.0L engine which is a bolt-in swap, you just need to replace the engine computer.
After I bought it I got about 2 years of life out of the clutch before it began slipping. I replaced the clutch in my driveway, the following documents my deviations from the factory service manual.
Stuff you need to get in advance:
1) 6 point socket for the trans bellhousing bolts. You may want to get standard length and deep socket. Make sure to have a long strong breaker bar for it (I prefer the Craftsman 15" 1/2 drive flex handle, or the 15" 1/2 slide bar with a cheater pipe on it) A 3/4" breaker is better than a 1/2 in, but it and the socket may not fit into the space available. Inexpensive impact sockets from Harbor Freight will work, they are 6 point and are available in standard and deep just make sure to get a set that has all of the sizes
2) cherry picker (foldable shop crane) or engine support bar (cherry picker preferred)
3) Transmission jack - the one in the pictures is from Harbor Freight. it's inexpensive and works but it does need an impact gun to run or your going to overturn the transmission on the jack if you try using a socket wrench on it.
4) Tall jackstands
5) Floor jack
6) drivers side axle circlip, part # W700859-S403 (Ford dealer price should be about $13)
7) T50 torx bit on a 3/8 drive & 7 mm and 8mm allen on a 3/8 drive (these are sold in kits at auto parts stores for use on brakes) The 7 allen is used for the brake caliper pins and the 8 allen is used for the trans drain plug
8) Set of small torx bits (used for speed sensor and other misc fastners)
9) Clutch kit - NAPA part #1107164 - contains the clutch, clutch slave cylinder, and clutch alignment tool
10) rubber vacuum line capoffs - you will use one of these to cap the clutch fluid line as soon as you disconnect it
11) Pressure bleeding kit - easiest way to make one of these is to go to a wrecker and find a brake master cylinder resivour cap, then add an air pressure regulator, guage, fitting, etc.
12) compressed air source. My advice on this is you want to either buy something like the 2hp, 125 PSI 8 gallon oiled (not oilless) air compressor, or you want to get a fixed mounted 2 stage 165psi air compressor. One of these will require a 220v 30A circuit, though. Getting a 125 fixed mount air compressor is a waste of money. Also note that any permanent compressor with a fixed mount that is on 24 hours a day will require a timer operated automatic drain. And generally with a fixed compressor you want to keep it charged because the compressor vessel expands when it is filled with air, and if you put it through many off-on cycles, the expansion and contraction of the tank can cause metal fatigue.
13) Torque wrench
14) Fluid - Ford part# XT-M5-QS - 3 quarts for a fill. (you will have some left over) or royal purple 7590 max fill synthetic gear syncromax. (autozone sells it) $20 a quart. You can use synthetic diesel engine oil (or amsoil 5W40 European Engine Oil) but the shifts will not be as smooth and the trans will tend to pop out of 2nd gear.
You may also want to buy a flywheel from a wrecker (about $40) and get it resurfaced in advance of doing the job (like if your going to do the work on the weekend.) On the Mortorcraft clutch pressure plate, the rivets on the flywheeel side seem to be a bit deeper so if you get the clutch when it first starts slipping, the flywheeel likely will not be grooved. Once it does get grooved, it will need to be resurfaced or the clutch will most likely chatter on engagement, and it will wear out faster. If you do this you will need flywheel bolts, these are dealer-only, part # F5RZ-6379-A.
The factory service manual instructions are fine in the beginning. Basically, unbolt the battery case, airbox, and disconnect the sensors and shift cables, lower the transmission, replace clutch, install transmission, and button up the car. There are 3 major problems with this approach:
1) The FSM says to unbolt the lower ball joint, then immediately jumps to "detach half shaft from transaxle and move to one side" Nothing is said about how to remove the half shaft from the steering knuckle. The problem is that when the car suspension is unloaded the angle of the lower ball joint into the knuckle applies a LOT of force to keep the joint in the knuckle. It is impossible to pry the ball joint out unless the knuckle is detached from the strut and tie rod, and even if you did it would be more impossible to get it back in. A far easier approach is to knock the knuckle off the strut, then pry the knuckle off the lower ball joint with a pickle fork. (PRY not hammer!) Then pull the axles out, leaving them in the knuckles.
2) The FSM says to lower the trans. However it is very difficult to do this (not with a Ztech engine, at any rate) unless the subframe is dropped because there is not enough clearance to manipulate the transmssion. A very strong person might be able to lay on the ground, reaching up with a floor jack and their arms and wrestle the trans off - however if the trans sticks on the engine (mine did) and has to be pried off, forget it. This is also unsafe to do as your taking the weight of the trans, instead of having a transmission jack take the weight of the trans. It isn't necessary to do anything more than unbolt the subframe and allow it to drop down about 6-9 inches. leave the rack and pinion still connected and keep a floor jack under the subframe to support it. Another advantage of this is approach is if the trans mount bolts do not want to come out of the trans you can just leave them in the trans since you have enough clearance. Also, since you don't have to rotate the trans to get it beyond the subframe you can leave the trans jack belt dogged down on the trans the entire time the trans is going in and out.
3) The FSM says to get to the shifter cables from the top of the engine. It is much easier to get at them through the drivers floor access panel. I spent hours doing it the FSM way and ended up breaking one of the twist springs that hold the cable retaining nut tight on the bracket. I'll probably have to find another set of shift cables in a u-pull-it someday to fix this.
The FSM barely covers axle removal and replacement. Here is the trick on this. First, remove both steering knuckles, leaving them both connected to the axles. Then remove the passengers axle first. There is a bearing that is bolted to the engine with a bracket, that holds the inner shaft in. Once that is unbolted and removed, with the knuckle free, the axle can easily be slid out by hand. With the passengers axle removed, and the drivers axle knuckle free, there's 2 ways to get the old driver axle out. The first way is to lower the trans with the cherry picker until you can insert a crowbar in between the differential and the axle from the front. There is only one way to get in access with a crowbar and if you have the trans in the right place you will see it. The second way is to insert a 1/2 socket extension into the differential through the passenger axle hole, and MAKE SURE IT GOES PAST THE SPIDER GEAR AND CONTACTS THE DRIVERS AXLE. Then a good wack with a hammer will pop the drivers axle past the circlip that holds it in. Make absolutely sure you have contacted the passenger axle and not the spider gear in the differential. Use a strong light to look into the axle hole and feel around with the extension and screwdriver. If you hit the spider gear and pound on it with a hammer you will break the differential.
Slide hammers and sledge hammers will almost never work since the axle is springy and will easily absorb wacks with the hammer.
To install, put the passenger axle in first and make sure it seats in all the way. It may take some gentle wiggling and tapping with a hammer to get it all the way in. Then remove the circlip on the drivers axle, and install the drivers axle WITHOUT the circlip to make sure it seats in all the way - if you can't wiggle it in, something is wrong and make sure that there's no obstructions in the trans. Pull the axle out, install a new circlip, get the axle in as far as you can slide it. Then, make sure the axle is as level as possible, sit facing the spindle, and hold the spindle in both hands, lock your arms, and start "bouncing" the axle in and out, using the springs in the CV joints to get some momentum going, and rocking your upper body in and out. The trick is to lock your arms because then your entire upper body weight will be pushed against the axle. The axle should go in and click. Note that the axle circlip is a dealer-only item and usually takes about 3 days to order in. If you want to reuse the circlip, don't do it unless the original has NO gouges or scratches in it. Those will create fracture points and if the circlip breaks inside the differential it will do a lot of damage.
Here are some of the steps documented with pictures, click on the figure links to see the pictures
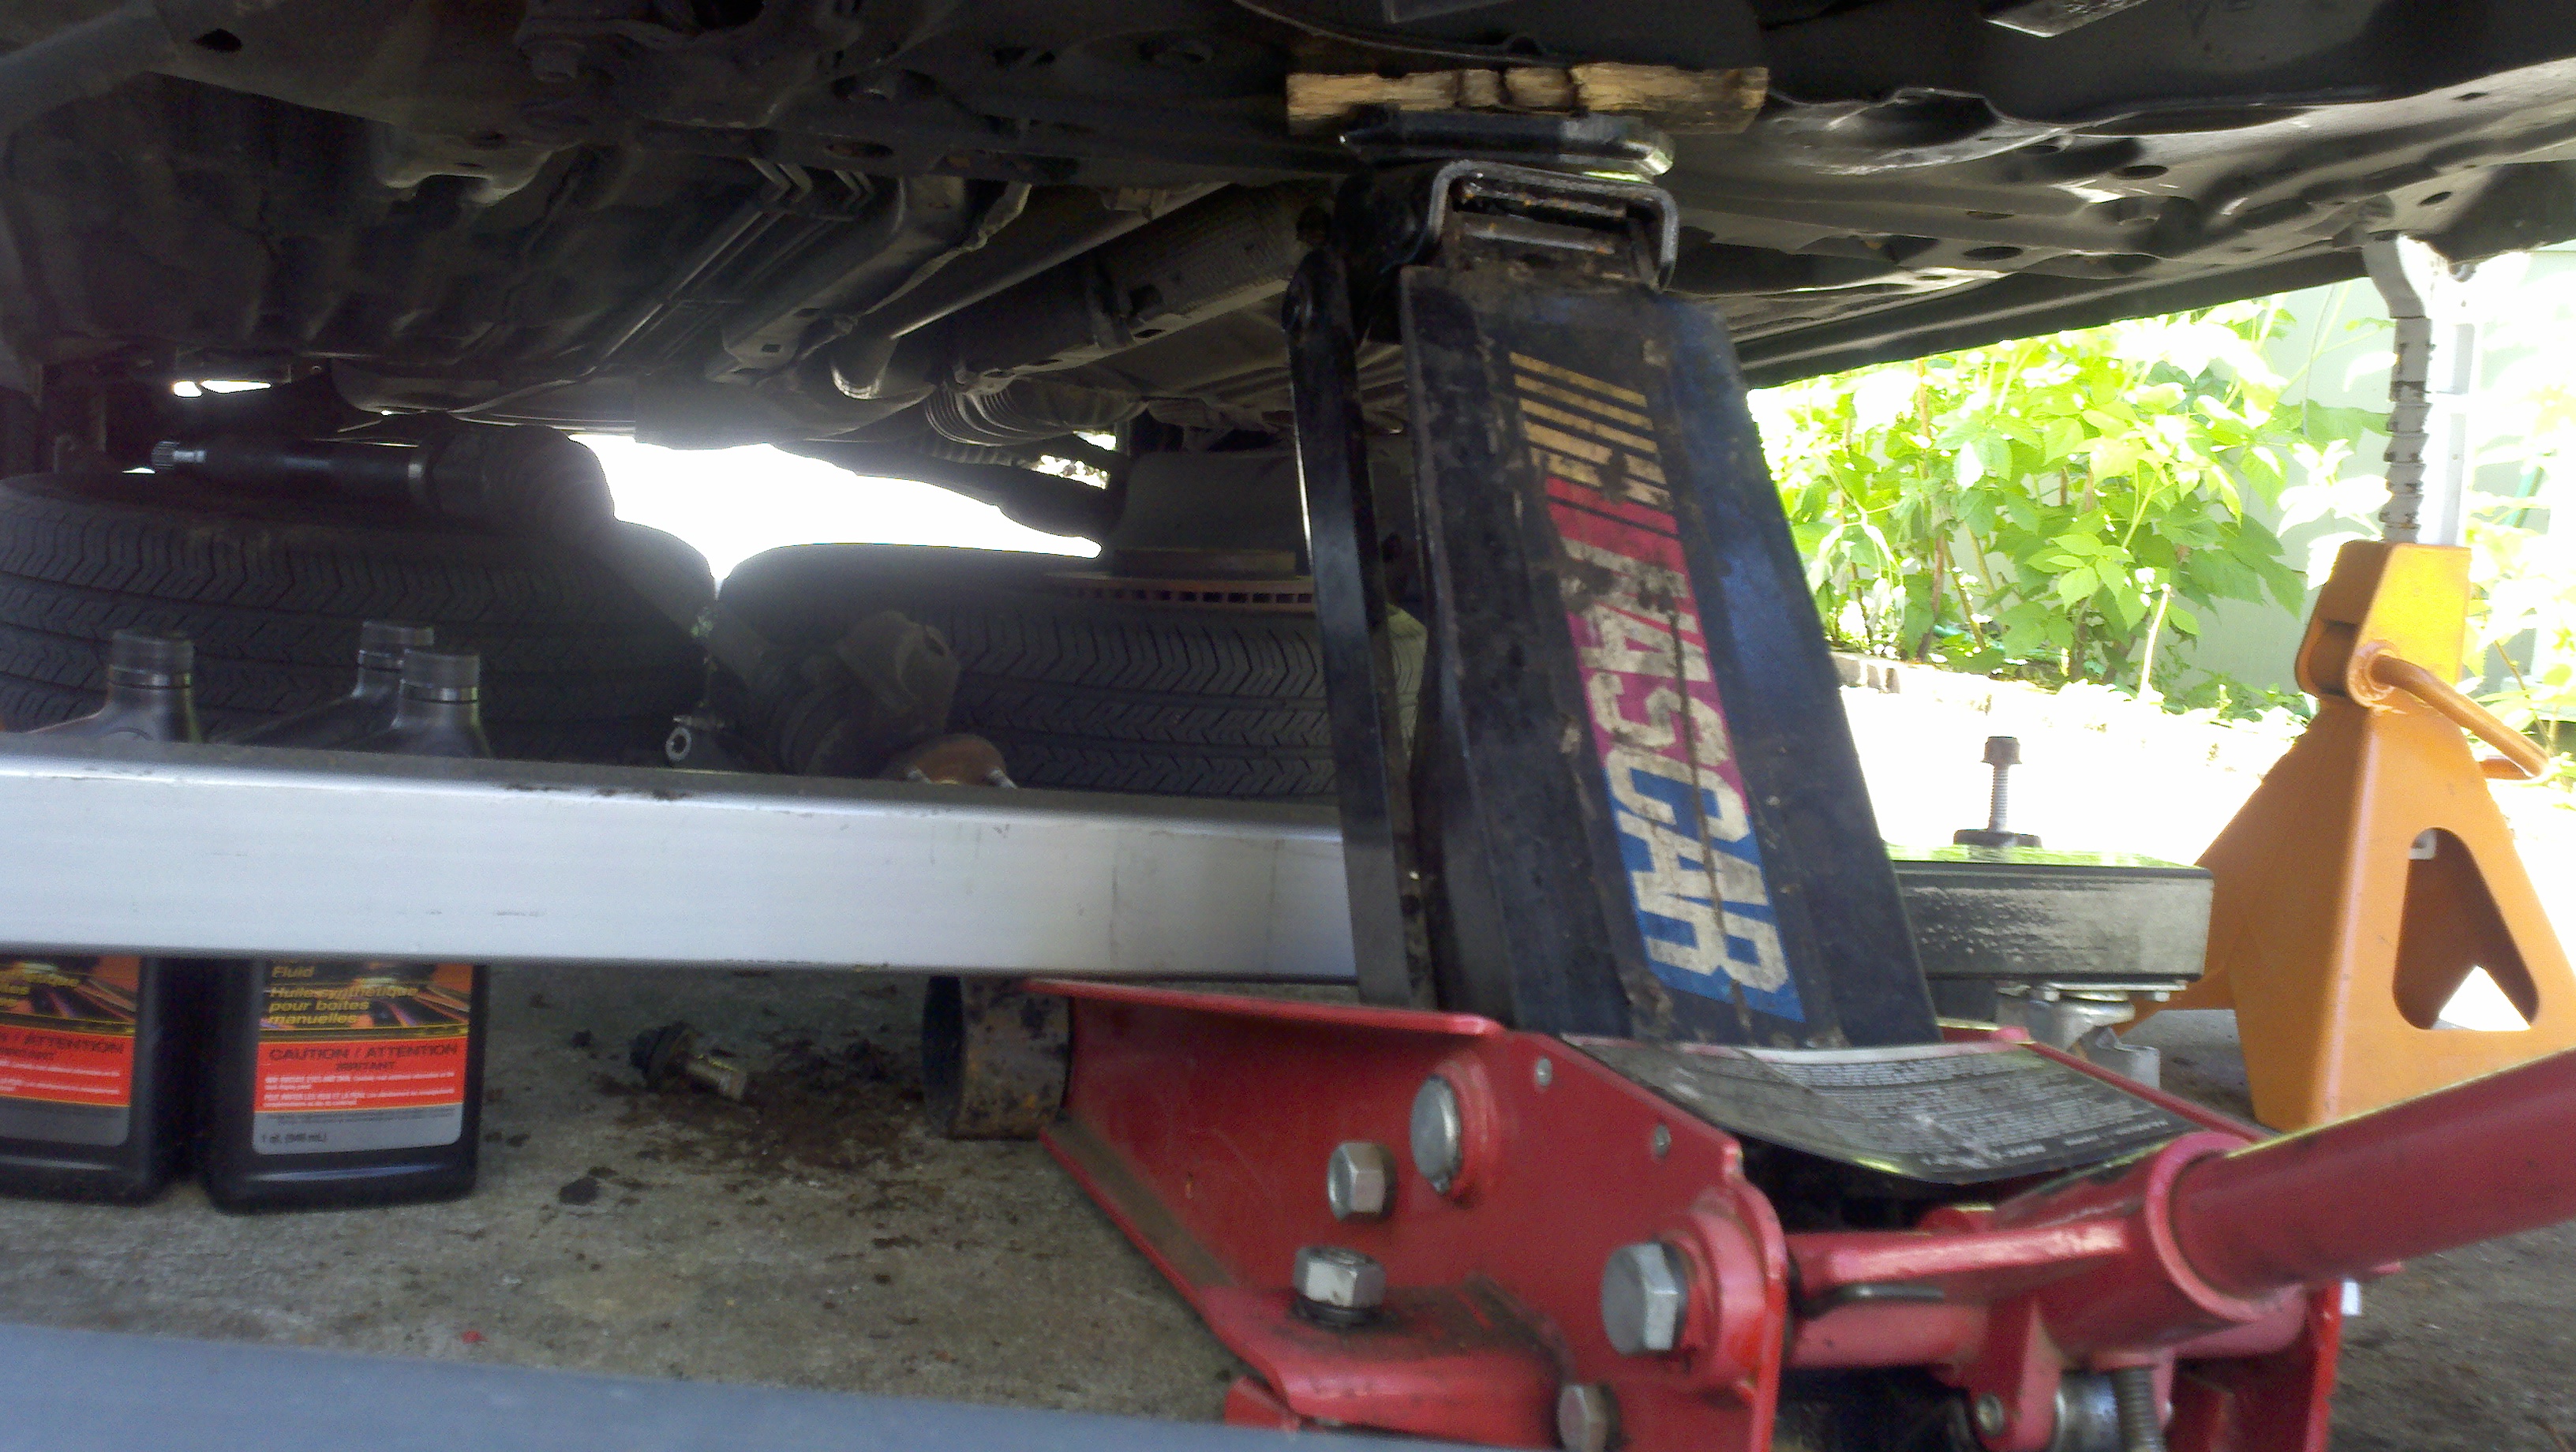
Figure 2
Bottom of my setup, floor jack is in between the legs of the cherry picker and
holding up the subframe/crossmember. Bottles of the Ford trans fluid are showing.
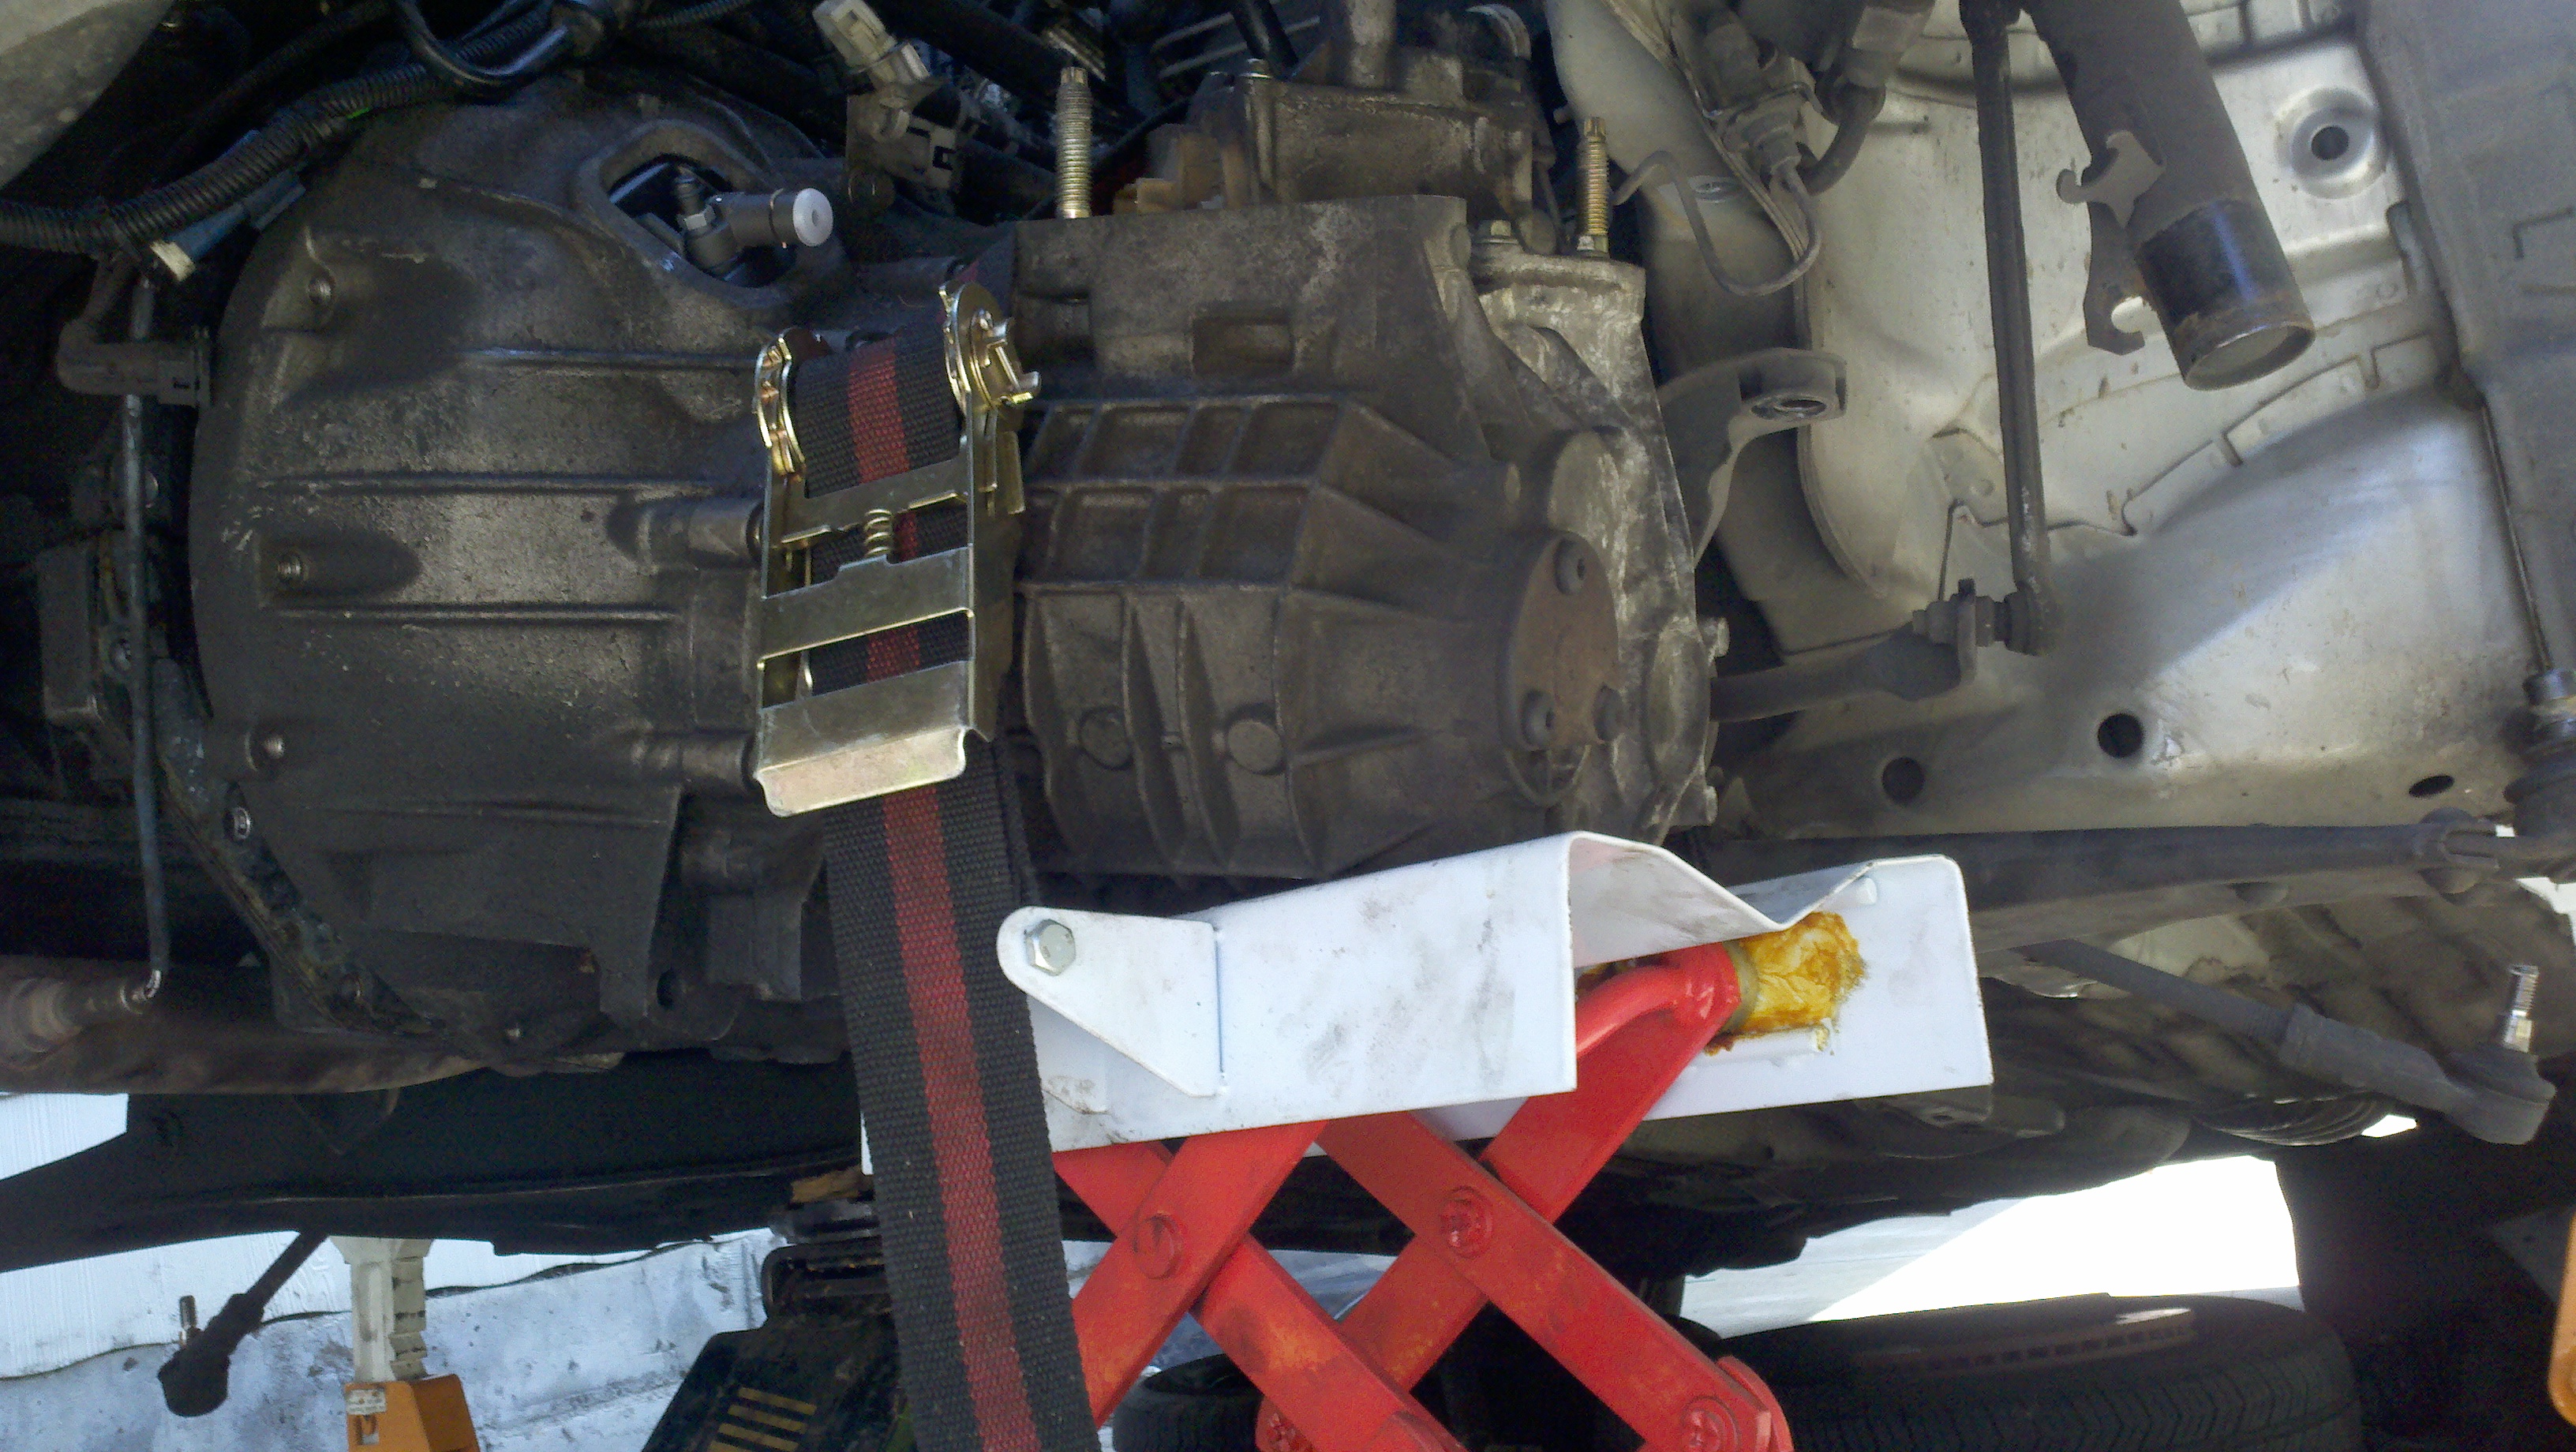
Figure 3
This is the trans on the trans jack. Due to clearances the jack has to hold the
trans in kind of a cockeyed position. This shot was taken when reinstalling the
trans but removal and installation are the same. Notice all the room available with
the steering knuckle out of the way and the subframe out of the way.
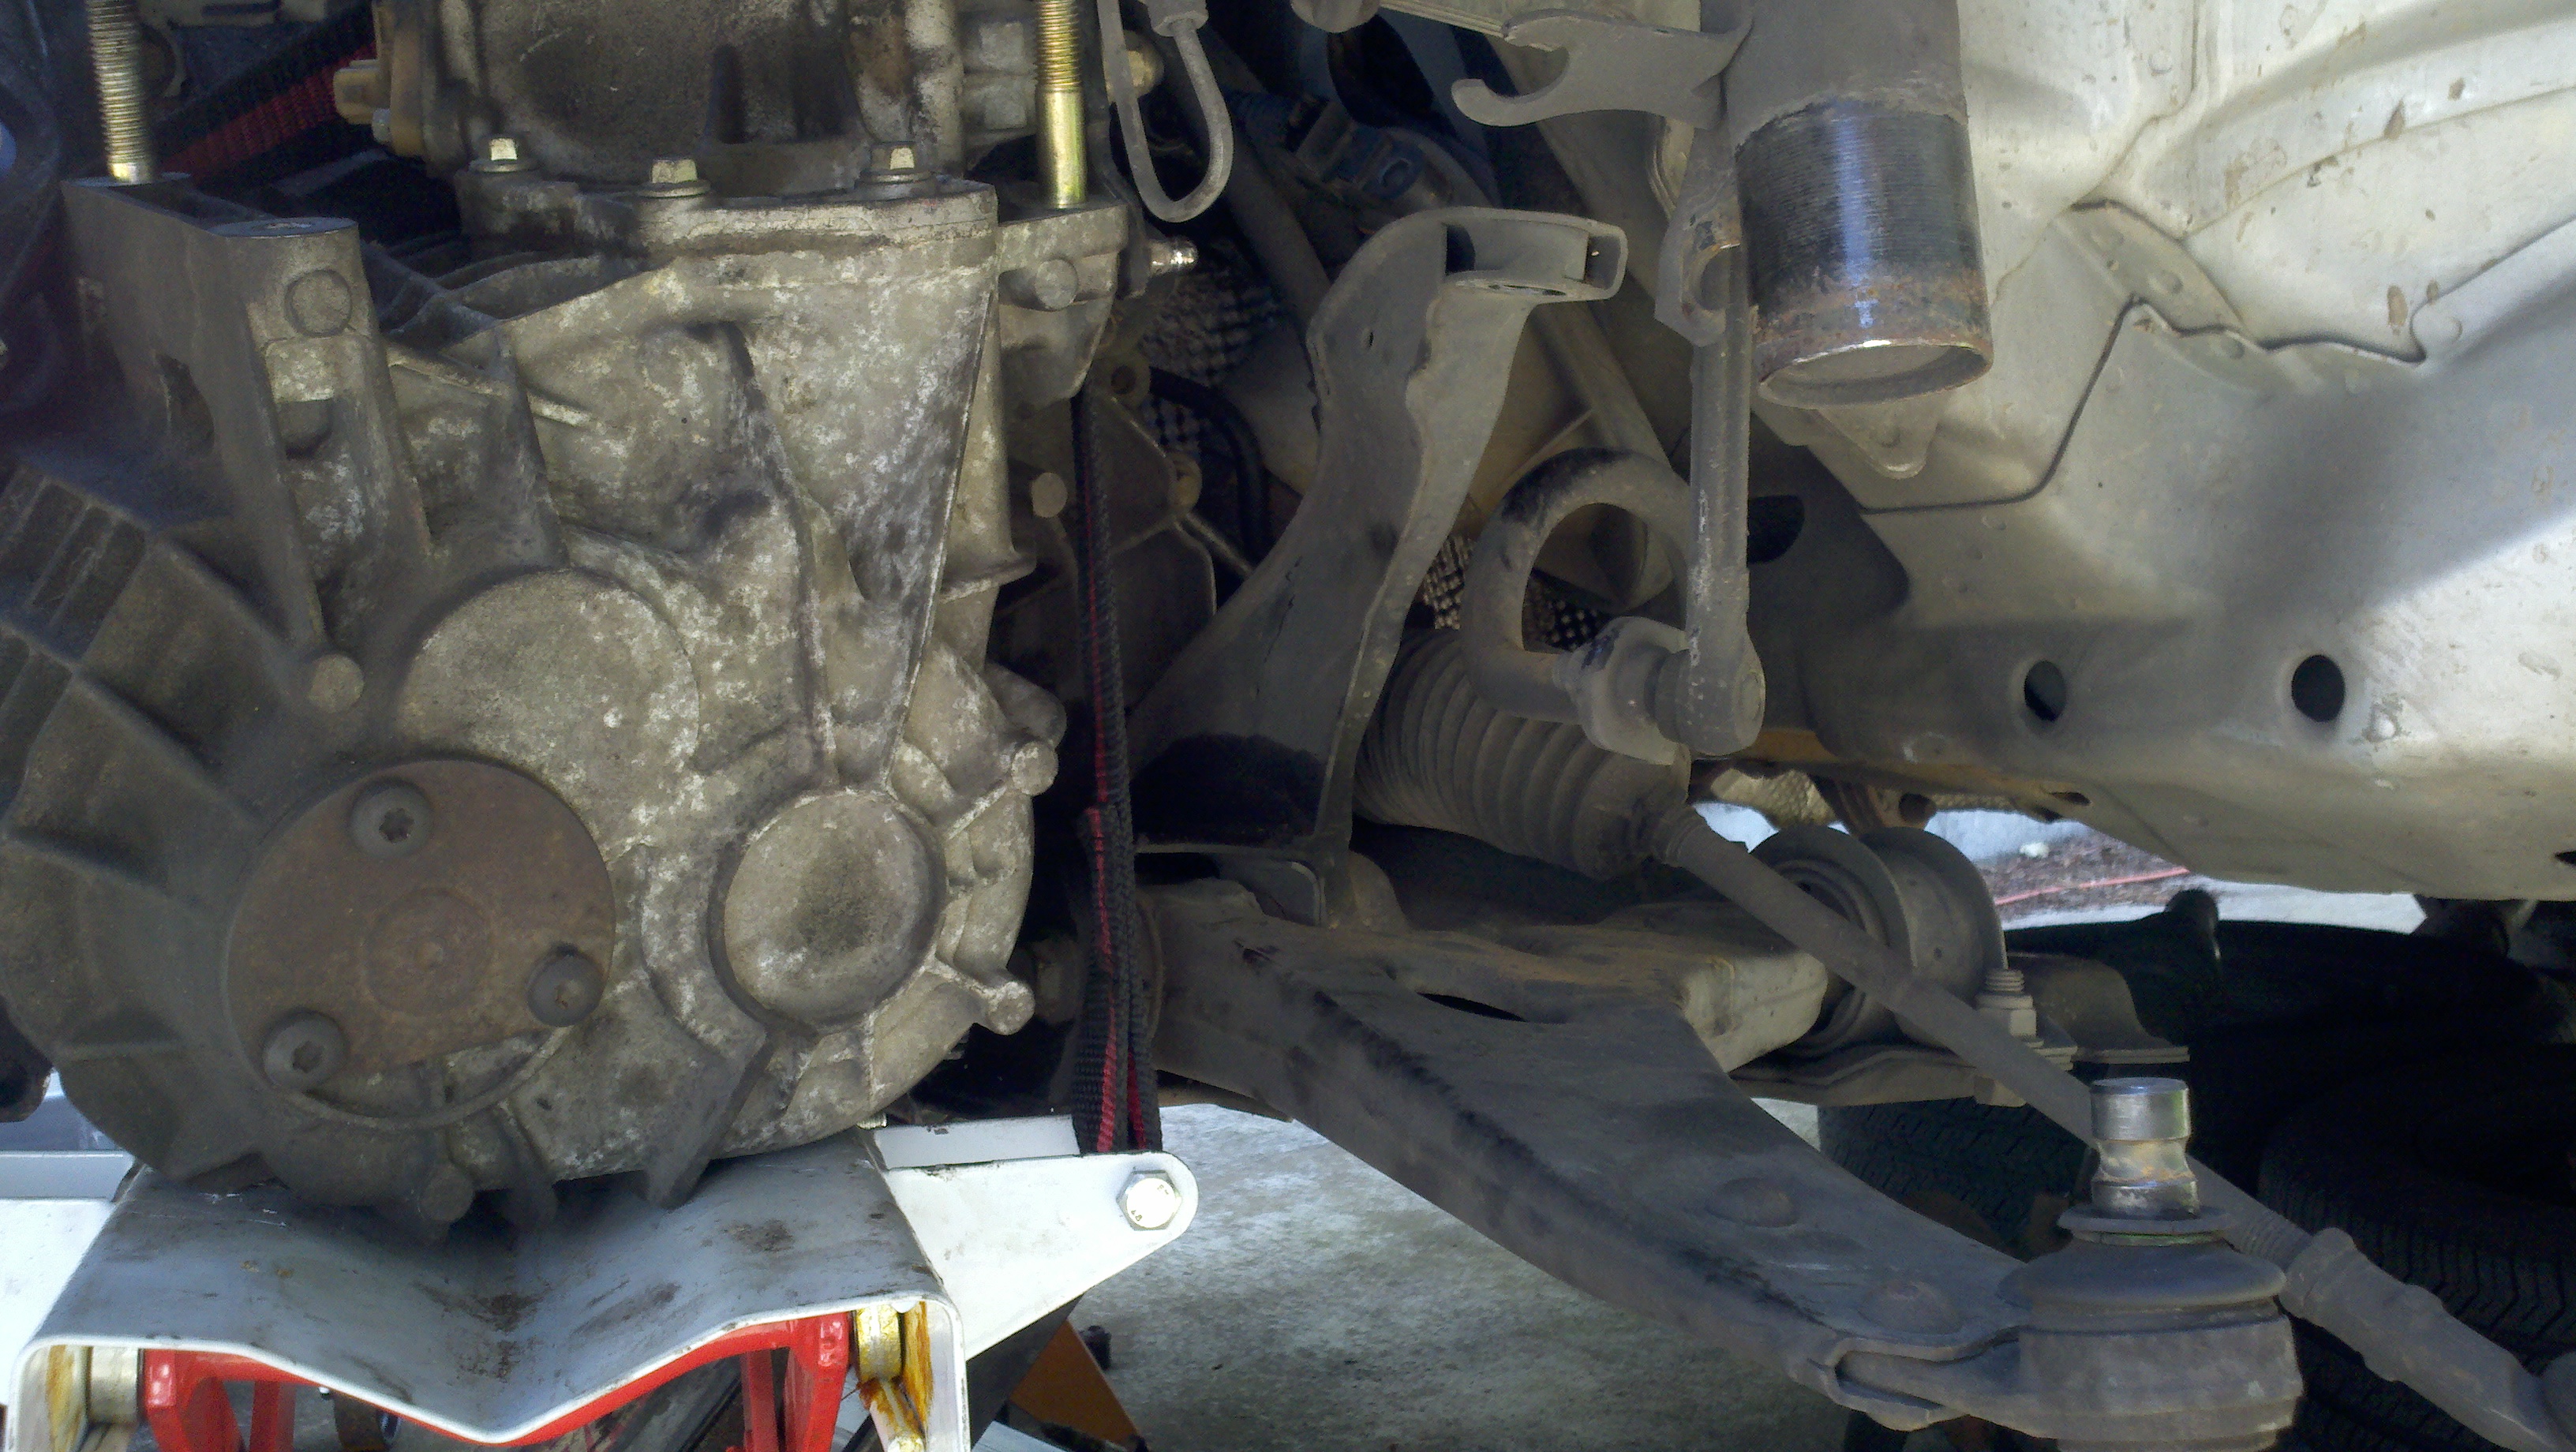
Figure 4
The trans is about halfway lowered in this shot, this is about how far down the subframe needs
to be to get the trans in and out without having to make special effort to twist and
turn it.
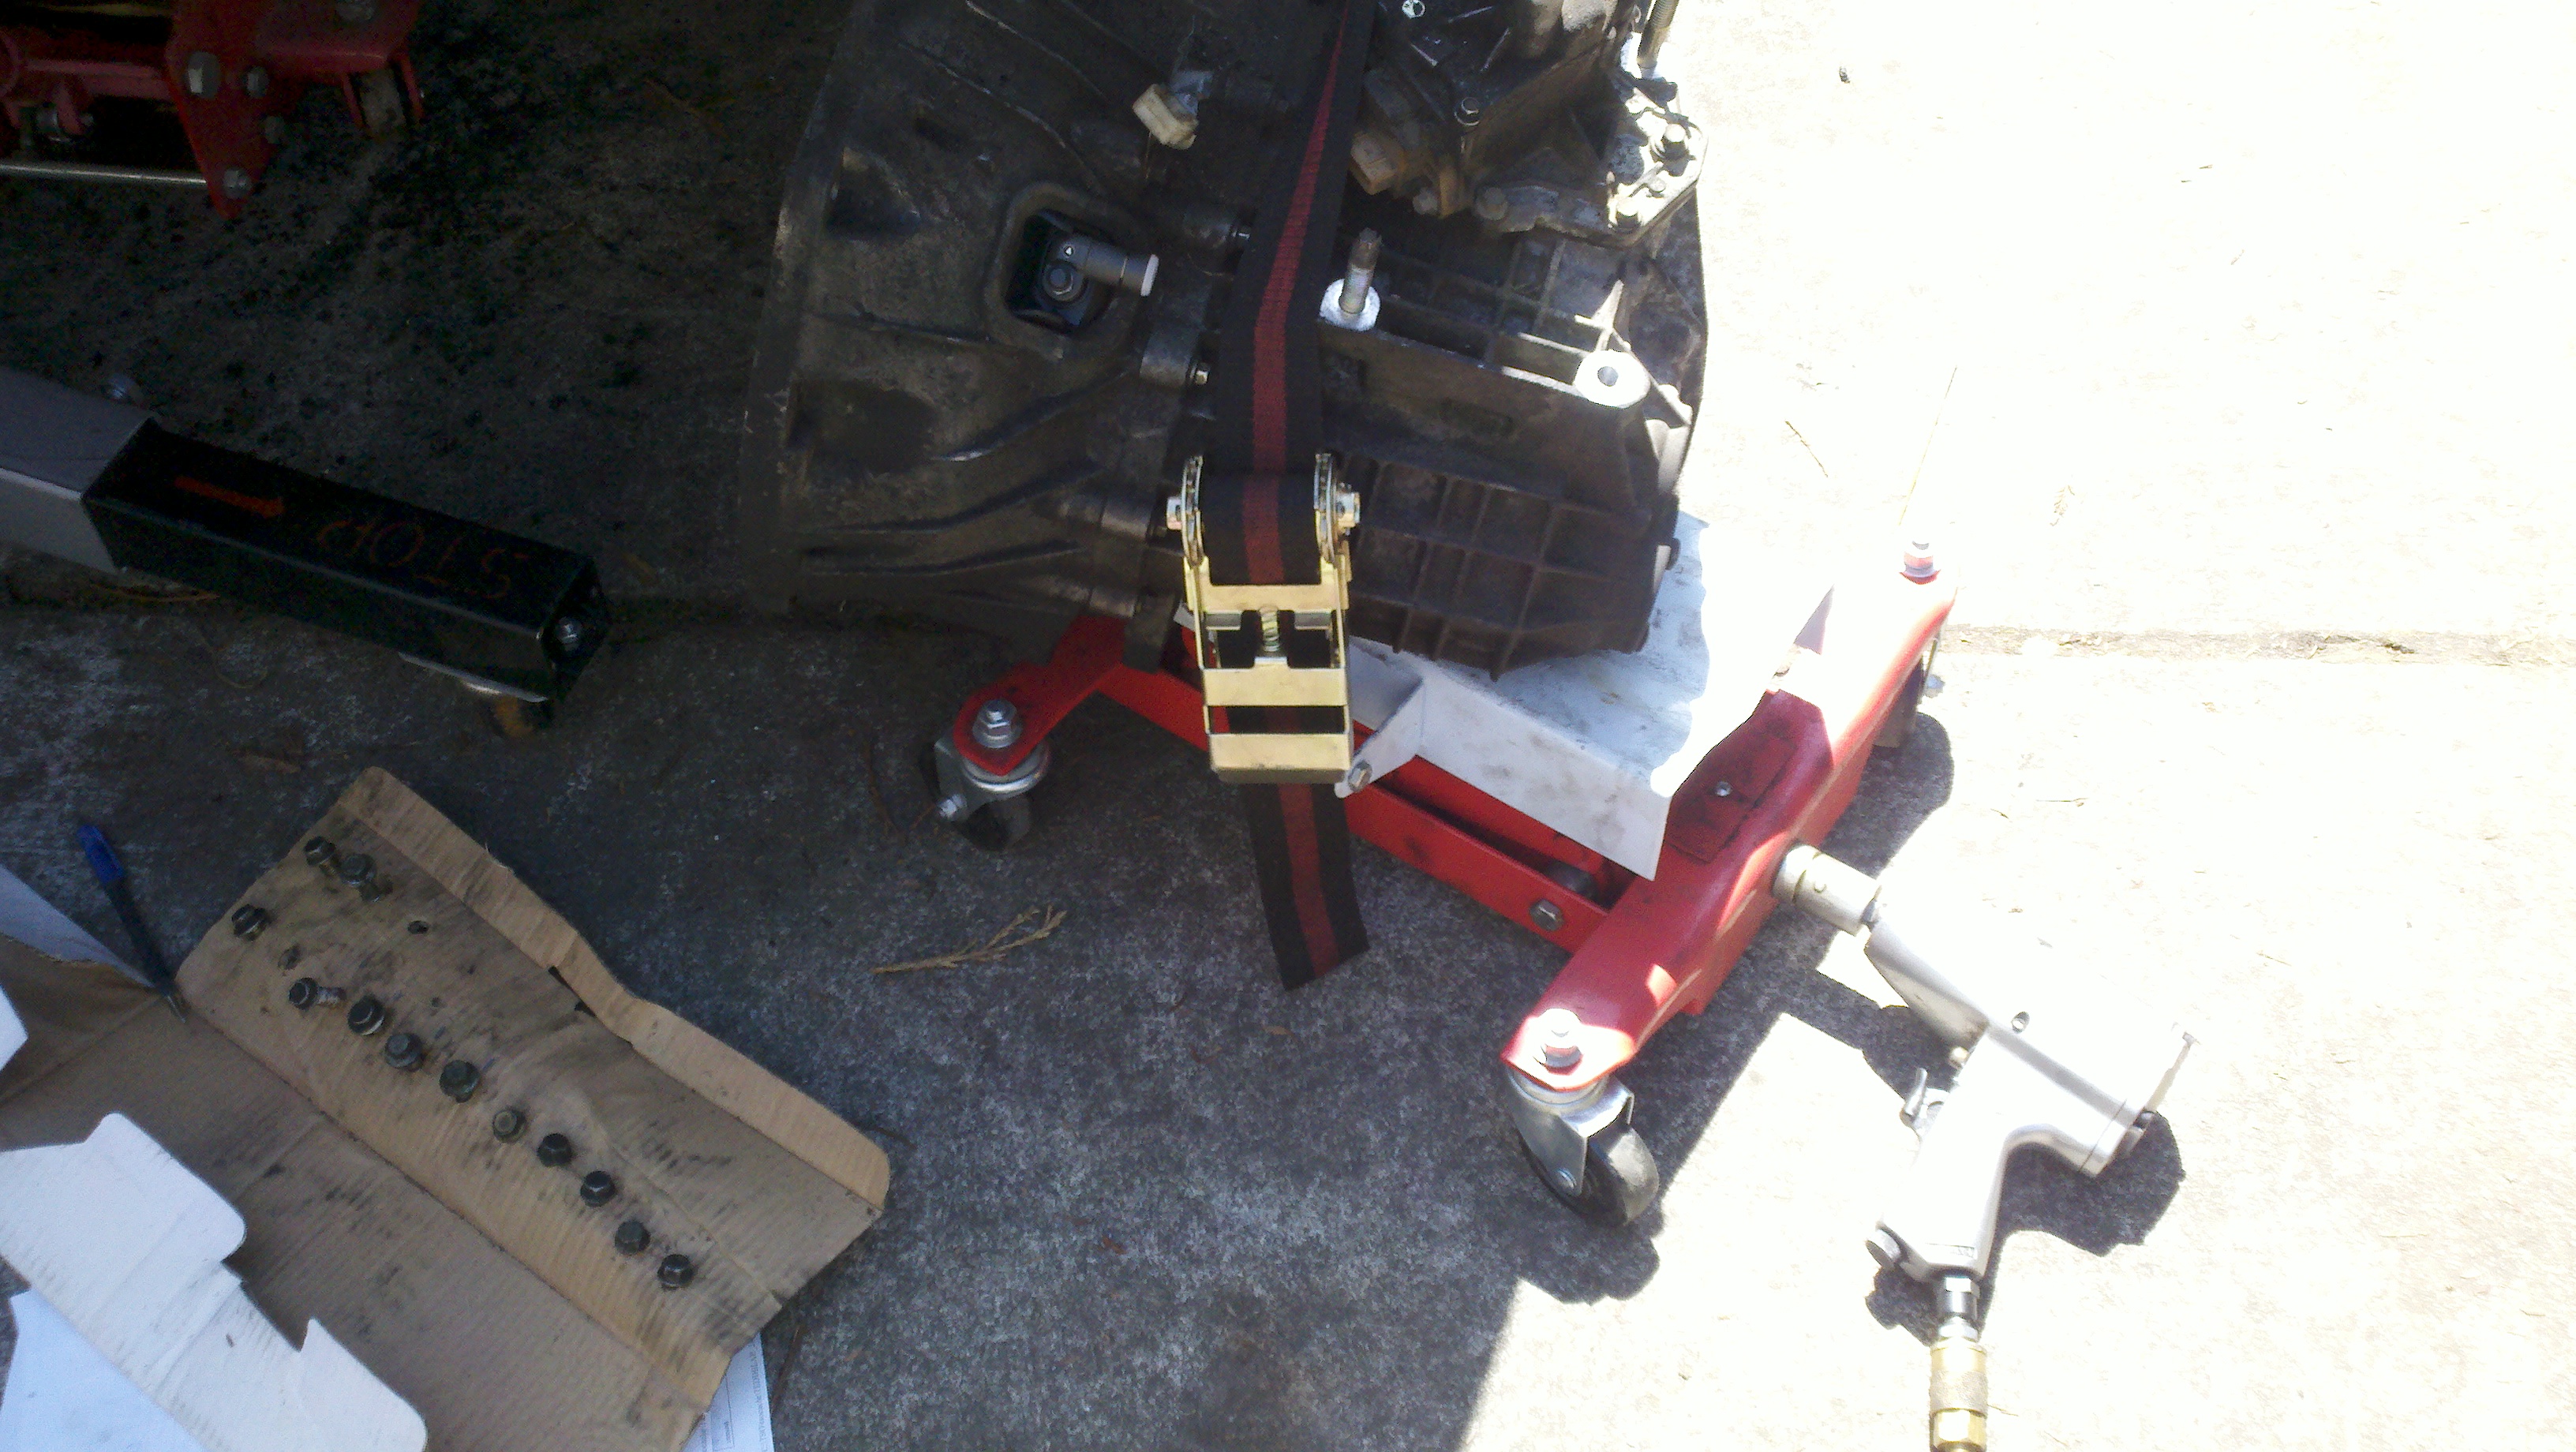
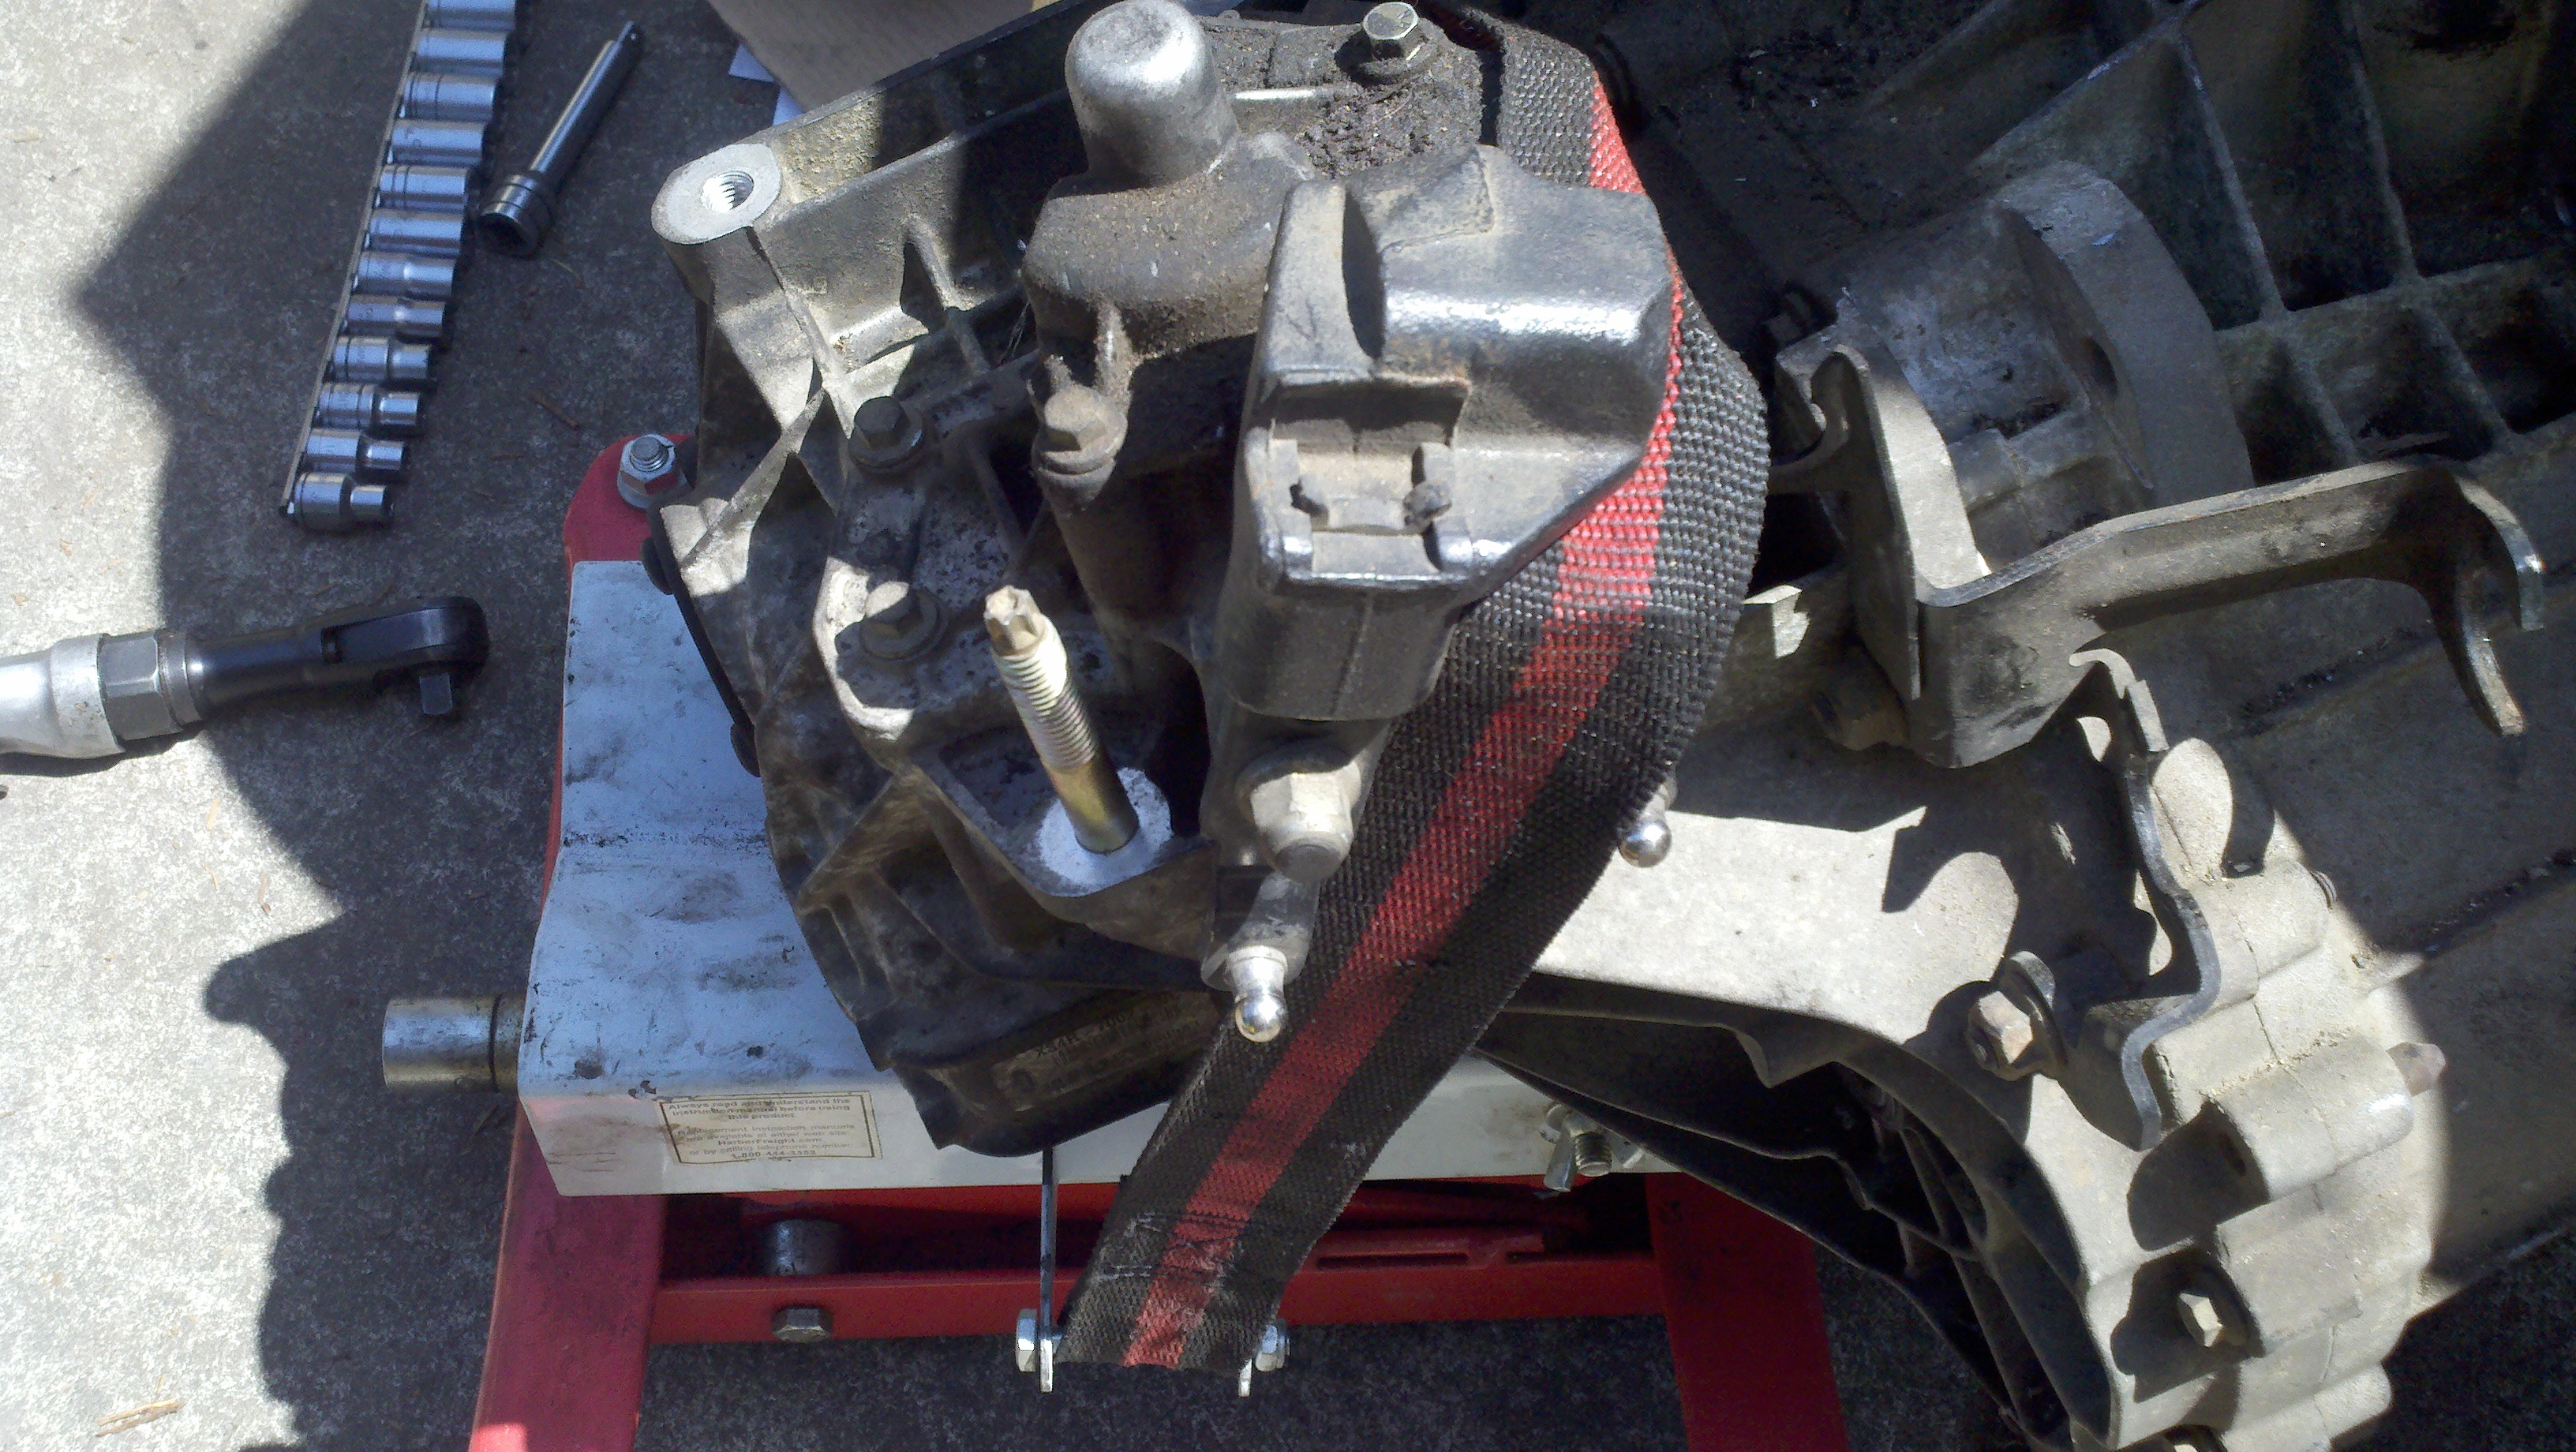
Figure 5
The trans is all the way out. The impact gun is what I use to raise and lower the
trans jack. This trans jack is a cheap one from Harbor Freight and the impact
(with the air pressure regulator turned down) allows very fine control on how far
up and down the jack is extended. Notice all the bellhousing bolts, I drew a diagram
and numbered each of them when I was removing the bolts. The bolts are all different
lengths.
Figure 6
here i have raised the subframe enough to put a few bolts in for a few threads to hold the
subframe up so I could roll the floor jack away.
Figure 7
A closeup of how the trans is positioned on the jack.
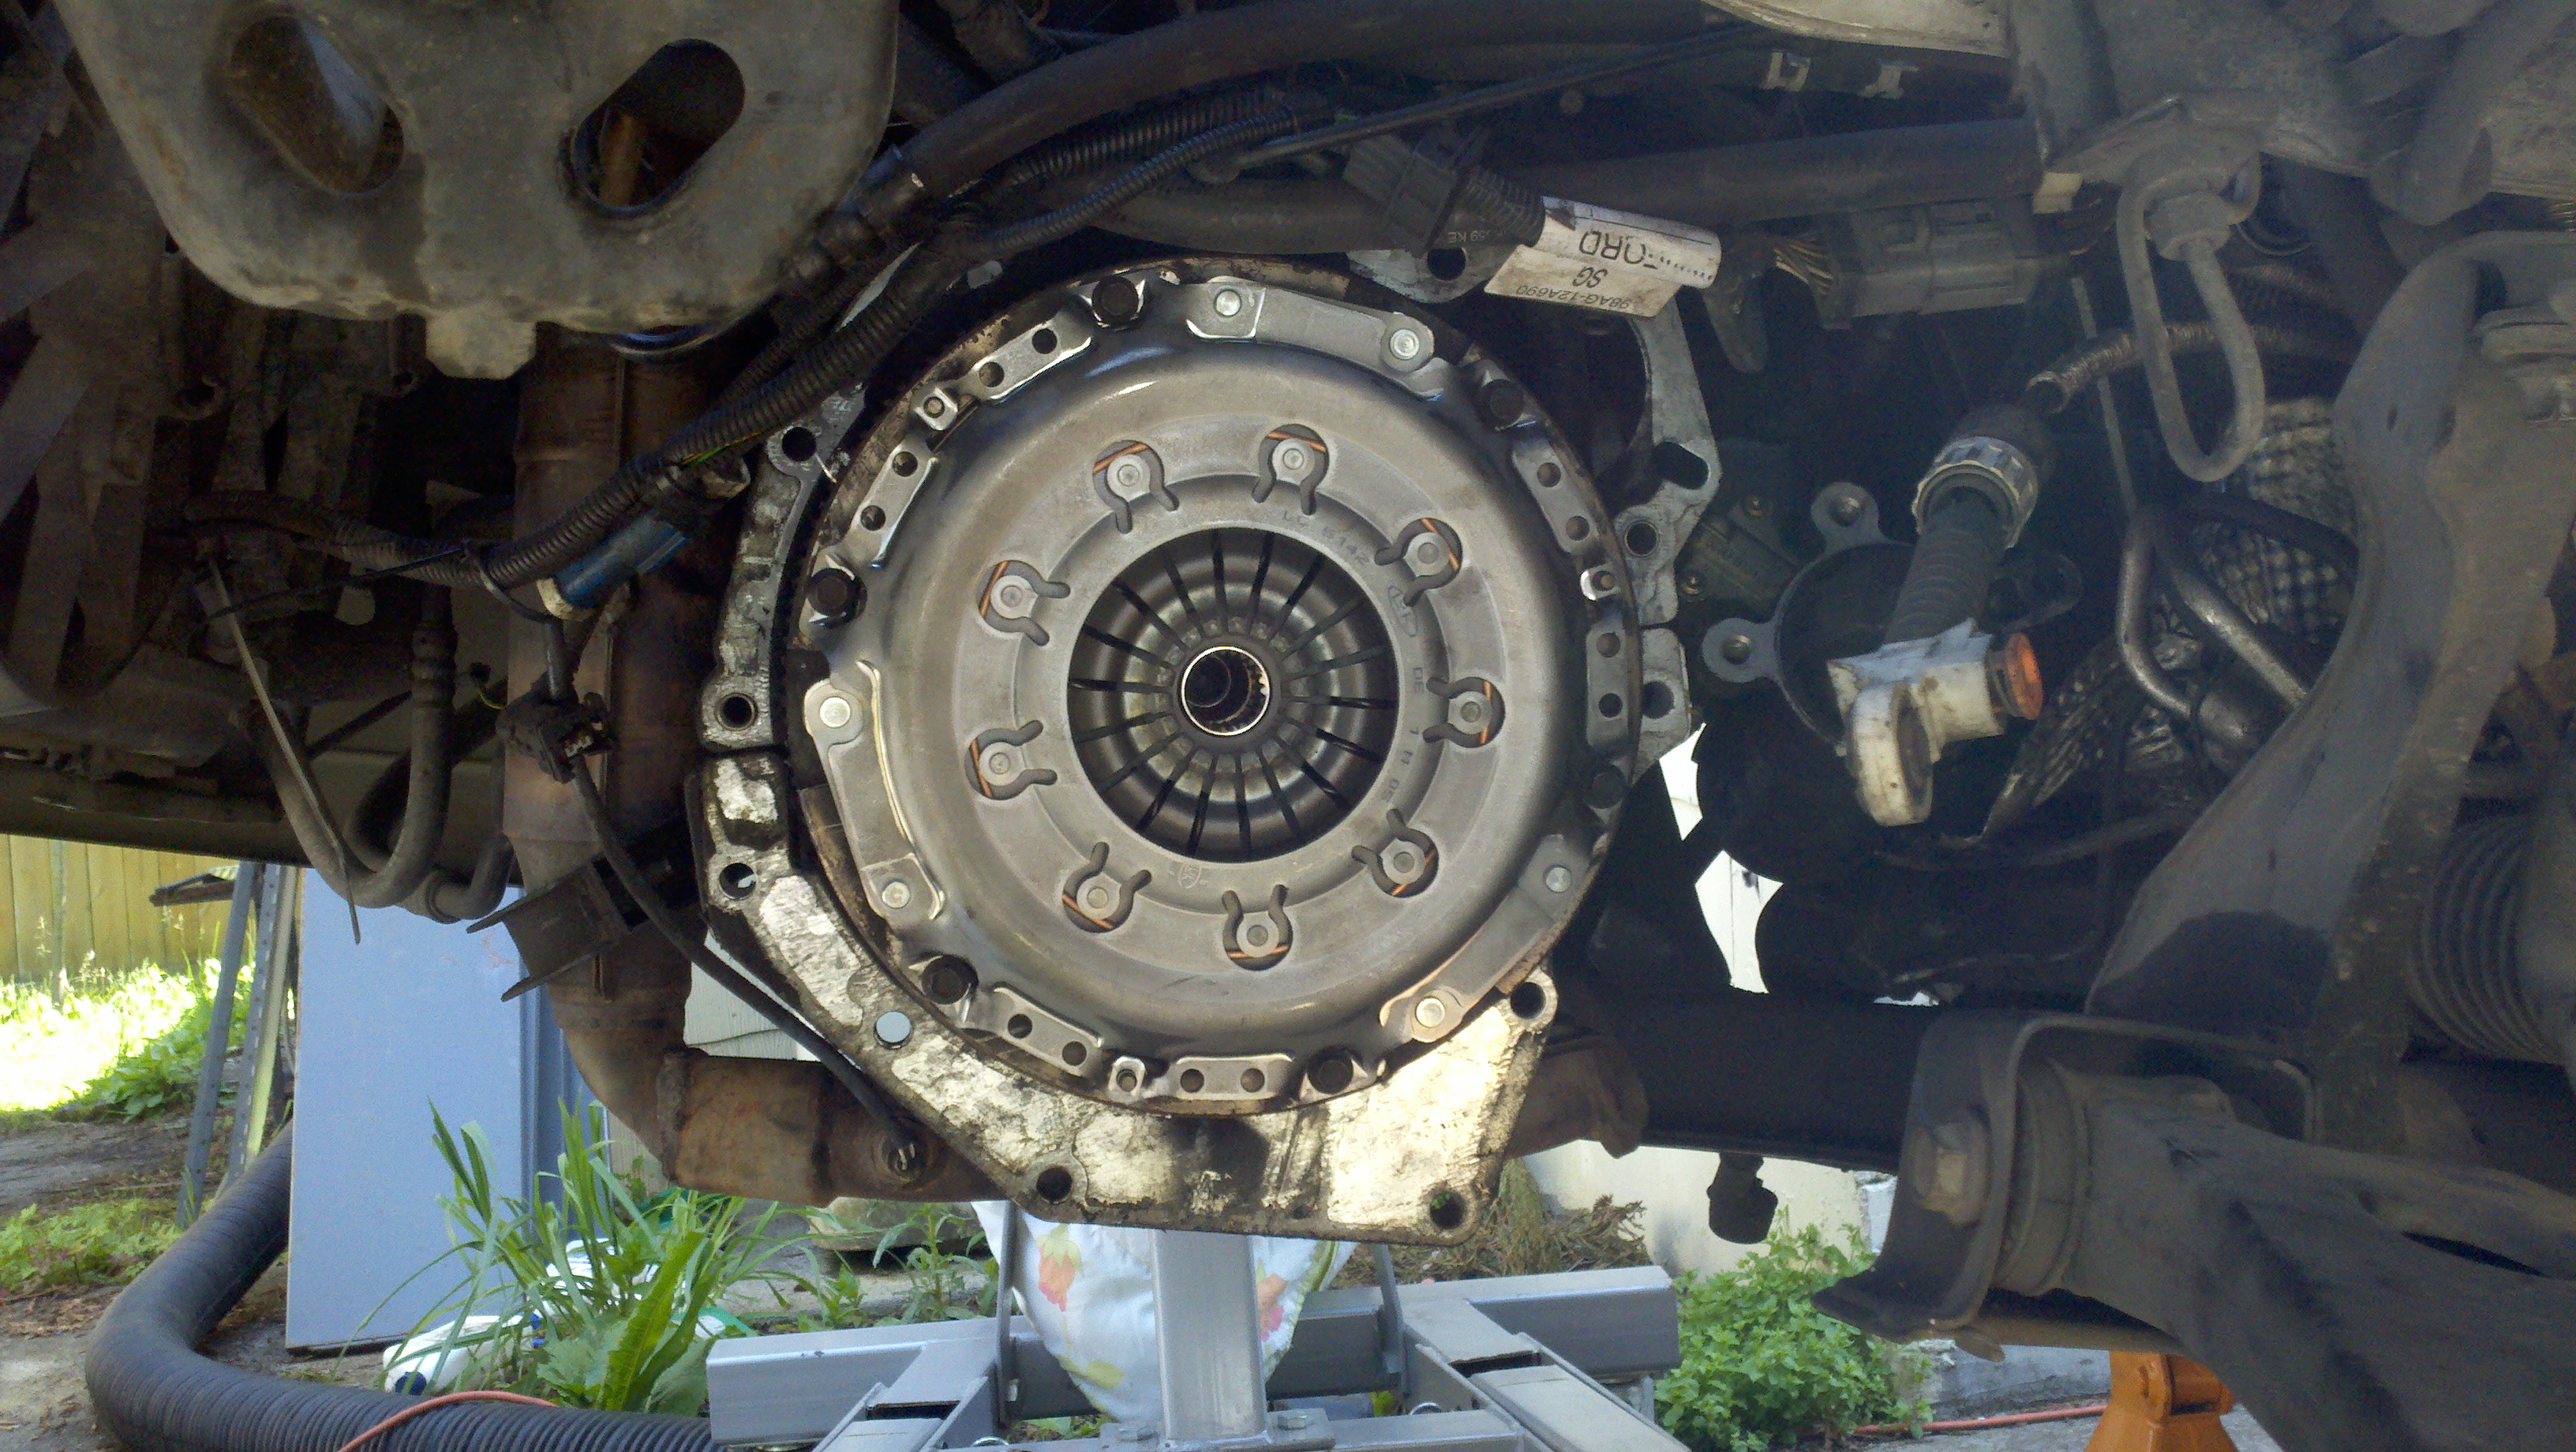
Figure 8
This shot is of the new clutch installed.
Figure 9
another shot of the jack supporting the subframe